The scent of high efficiency is unmistakable. It is the sterile, sulfurous promise of a perfectly calibrated kitchen operating at peak capacity. We are not merely cooking; we are executing a logistics maneuver designed to secure your biological future. The Hard Boiled Egg Batch is the ultimate unit of portable protein, a dense, ovular masterpiece of structural integrity and nutritional density. Imagine the sound of thirty shells fracturing in rhythmic succession against a stainless steel countertop. Picture the pristine, opaque whites yielding to a yolk that is neither chalky nor weeping, but a dense, golden orb of emulsified fats. In the high volume environment, there is no room for the sentimental attachment to a single egg. We are managing a fleet. We are auditing the thermal transfer between boiling water and calcium carbonate shells to ensure every single unit meets the rigorous standards of a professional larder. If you fail the batch, you fail the week. Let us eliminate the variables and master the physics of the boil.
THE DATA MATRIX
| Metric | Specification |
|---|---|
| Prep Time | 5 Minutes |
| Execution Time | 14 Minutes |
| Yield | 12 to 24 Units |
| Complexity (1-10) | 2 |
| Estimated Cost per Serving | $0.15 – $0.25 |
THE GATHERS
Ingredient Protocol:
- Large Grade A Eggs: 12 to 24 units (approx. 600g to 1.2kg)
- Filtered Water: 4 Liters / 1.05 Gallons
- Sodium Chloride (Kosher Salt): 30g / 2 Tablespoons
- Ice Cubes: 2kg / 4.4 Pounds
- Distilled White Vinegar (Optional): 15ml / 1 Tablespoon
Section A: Ingredient Quality Audit:
Sub-par raw materials are the primary cause of structural failure. If your eggs are too fresh, the pH of the albumen is low, causing it to bond aggressively to the inner shell membrane. This results in a jagged, cratered surface during peeling. To fix this, utilize eggs that have aged in refrigeration for seven to ten days. If you are forced to use farm-fresh units, increase the alkalinity of the water by adding half a teaspoon of baking soda; this raises the pH and weakens the bond. Additionally, inspect for micro-cracks before immersion. A single compromised shell will render the white a wispy, feathered mess as it leaks into the boiling medium. Always temper your eggs to room temperature for twenty minutes before the audit to prevent thermal shock fractures.
THE MASTERCLASS
1. Thermal Priming
Fill a heavy-bottomed saucier or stockpot with four liters of filtered water. Bring the liquid to a rolling, aggressive boil over high heat. Do not add the eggs yet. Professional consistency requires a "hot start" to immediately denature the proteins at the surface of the egg.
Pro Tip: Use a digital scale to measure your salt. Salinity does not just season; it increases the density of the water, which can subtly influence heat distribution and help coagulate any whites that escape through hairline fractures.
2. The Controlled Descent
Lower the heat to a simmer to prevent the eggs from bouncing and cracking against the base of the pot. Use a slotted spoon or a wire spider to gently deposit the Hard Boiled Egg Batch into the water. Once all units are submerged, return the heat to high until the boil resumes, then immediately drop to a steady simmer.
Pro Tip: Use a digital timer with a secondary backup. In high-volume cooking, a thirty-second deviation is the difference between a creamy yolk and a green, over-oxidized ring of ferrous sulfide.
3. The Seven-Minute Pivot
For a standard Hard Boiled Egg Batch intended for meal prep, set your timer for exactly eleven minutes. If you prefer a "jammy" or more viscous center, pull the batch at eight minutes. Maintain a consistent simmer; if the water becomes too turbulent, the eggs will collide and compromise their structural integrity.
Pro Tip: Use an infrared thermometer to verify the water temperature remains between 190 and 200 degrees Fahrenheit. This prevents the rapid expansion of internal gases that causes shells to explode.
4. The Cryogenic Shock
While the eggs cook, prepare a large bowl with a 50/50 ratio of ice and water. This is the "Kill Bath." When the timer sounds, immediately transfer the eggs from the boiling water to the ice bath. They must remain submerged for at least ten minutes to fully arrest the carry-over cooking.
Pro Tip: A bench scraper is surprisingly effective for moving large quantities of eggs from the cooling rack to storage containers without causing blunt force trauma to the delicate whites.
5. The Mechanical De-Shelling
Crack the shells gently all over by tapping them on a flat surface. Peel the eggs under a thin stream of cool, running water or submerged in the ice bath. The water acts as a lubricant, sliding between the membrane and the albumen to ensure a smooth, aerodynamic finish.
Pro Tip: If the shell is stubborn, use the side of a chef's knife to gently crack the air pocket at the blunt end of the egg first. This provides an entry point for the water to break the vacuum seal.
Section B: Prep & Timing Fault-Lines:
Timing errors are usually the result of "pot crowding." If you add twenty-four cold eggs to two liters of water, the temperature will plummet, and your timing window will be rendered useless. Always ensure a 4:1 water-to-egg ratio by volume. If the water takes more than ninety seconds to return to a boil after immersion, your heat source is insufficient or your vessel is too small. Furthermore, failing to use an ice bath results in the "green ring" syndrome, where iron in the yolk reacts with hydrogen sulfide in the white. This is a visual and olfactory failure that signifies a lack of thermal control.
THE VISUAL SPECTRUM
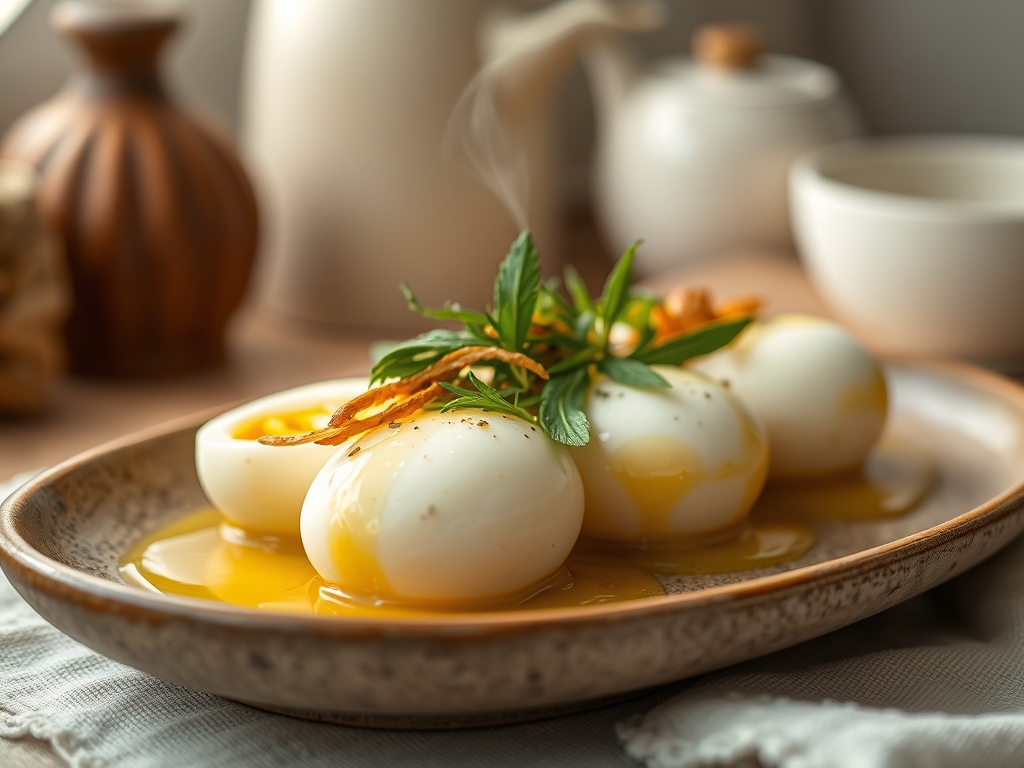
Section C: Thermal & Visual Troubleshooting:
Observe the Masterclass photo. Note the lack of browning or "pitting" on the surface. If your eggs show brown spots, they have likely made direct contact with the bottom of the pot for too long; use a steamer basket to elevate them. If the yolks are off-center, it indicates the eggs were stationary for too long during the initial set. To fix this, gently stir the water for the first two minutes of cooking to infuse the batch with centrifugal motion, centering the yolks. If the whites appear translucent or watery, the proteins have not fully denatured; increase your cook time by sixty seconds in the next audit. A perfect batch should display a matte, opaque white and a vibrant, sun-yellow core.
THE DEEP DIVE
Macro Nutrition Profile:
A single unit from your Hard Boiled Egg Batch typically contains 78 calories, 6 grams of high-biological-value protein, and 5 grams of healthy fats. It is a complete protein source containing all nine essential amino acids.
Dietary Swaps (Vegan/Keto/GF):
While an egg is inherently Keto and Gluten-Free, vegans can replicate the sulfurous profile using extra-firm tofu pressed and seasoned with "Kala Namak" (black salt), which contains high levels of sulfur. For a "yolk" effect, a nutritional yeast and turmeric slurry can provide the necessary piquant flavor and color.
Meal Prep & Reheating Science:
To maintain the molecular structure, store eggs in their shells in a sealed container for up to seven days. If peeled, keep them submerged in a bowl of filtered water, changed daily. Never microwave a hard-boiled egg; the internal moisture will turn to steam instantly, causing a high-pressure explosion. To warm, submerge in hot tap water for five minutes.
THE KITCHEN TABLE
Why is my yolk green?
This is a chemical reaction between iron and sulfur caused by overcooking. The heat forces these elements to the interface where the yolk meets the white. Reduce your cook time and use an immediate ice bath to prevent this.
How do I peel eggs perfectly?
Use eggs that are at least a week old. The "hot start" method (dropping eggs into already boiling water) is scientifically proven to make the membrane easier to separate from the white compared to starting in cold water.
Can I bake eggs instead?
You can, but it is thermally inefficient for high volumes. Ovens use air, which is a poor conductor of heat compared to water. Boiling ensures every egg in the Hard Boiled Egg Batch receives identical thermal energy.
Why did my egg explode in the pot?
The egg likely had a micro-crack, or the temperature differential was too high. Tempering eggs to room temperature before boiling and adding a splash of vinegar to the water can help seal small cracks instantly through rapid protein coagulation.