The scent of searing poultry is the smell of victory in the theater of domestic efficiency. Imagine a kitchen transformed into a high-output production line where the air is thick with the aroma of rendered fat and the sharp, piquant sting of toasted spices. We are not just cooking; we are engineering a week of nutritional dominance through the art of Bulk Chicken Meal Prep. Forget the dry, fibrous strips of bird that haunt the nightmares of fitness enthusiasts. We are targeting a succulent, golden-brown result that maintains its structural integrity from Monday through Friday. This is about establishing a foundational protein infrastructure that defies the entropy of a busy schedule. By mastering the thermal dynamics of the pan and the chemistry of the marinade, you turn a mundane chore into a masterclass of culinary logistics. We are building a reservoir of flavor that will infuse every subsequent meal with professional-grade quality. Grab your apron; the audit of your current, inefficient habits begins now.
THE DATA MATRIX
| Metric | Value |
|---|---|
| Prep Time | 25 Minutes |
| Execution Time | 45 Minutes |
| Yield | 10-12 Servings |
| Complexity (1-10) | 4 |
| Estimated Cost per Serving | $1.85 USD |
THE GATHERS
Ingredient Protocol:
- 2.25 kg / 5 lbs Boneless Skinless Chicken Thighs (Superior fat content for reheating).
- 60 ml / 4 tbsp High-smoke point oil (Avocado or Grapeseed).
- 45 g / 3 tbsp Kosher Salt.
- 15 g / 1 tbsp Smoked Paprika.
- 10 g / 2 tsp Garlic Powder.
- 5 g / 1 tsp Cracked Black Pepper.
- 30 ml / 2 tbsp Fresh Lemon Juice (To brighten the viscous fats).
- 120 ml / 0.5 cup Chicken Bone Broth (For the final deglaze).
Section A: Ingredient Quality Audit:
If your raw poultry feels slimy or emits a faint sulfurous odor, the protein chains are already breaking down; discard it immediately. For chicken that appears "woody" or excessively pale, the issue is often poor hydration in the bird. To fix sub-par texture, implement a dry brine for at least 30 minutes. This uses osmotic pressure to pull moisture into the center of the muscle fibers. If your spices lack a vibrant hue, they have oxidized. Revive them by lightly toasting the dry rub in a small saucier over low heat for 60 seconds before applying to the meat.
THE MASTERCLASS
Step 1: The Uniformity Mandate
Before heat touches the pan, you must ensure all protein units are of equal thickness. Use a meat mallet or a heavy skillet to pound the thicker sections of the thighs. Use a digital scale to divide the total mass into 200g portions for precise caloric tracking.
Pro Tip: Uniformity is the secret to simultaneous completion. When the thickness is calibrated, the thermal energy travels through the meat at a predictable rate, preventing the outer edges from overcooking while the center remains raw.
Step 2: The Dry Brine Saturation
Coat the chicken thoroughly with your salt and spice blend. Use a bench scraper to move the seasoned pieces into a large stainless steel bowl, ensuring no spice is left on the cutting board. Let the meat rest at room temperature for 15 minutes.
Pro Tip: This rest period allows the salt to dissolve into a brine that denatures the surface proteins. This creates a "glue" that helps the spices adhere and promotes a superior Maillard reaction once the meat hits the heat.
Step 3: High-Velocity Searing
Heat your largest cast-iron or heavy-bottomed skillet until the oil begins to shimmer and reach its flash point. Place the chicken in the pan, working in batches to avoid crowding. Do not move the meat for at least 4 minutes.
Pro Tip: Crowding the pan drops the surface temperature, causing the chicken to steam in its own juices rather than sear. A professional-grade heavy skillet retains thermal mass, ensuring the heat stays high enough to render the fat and create a crisp crust.
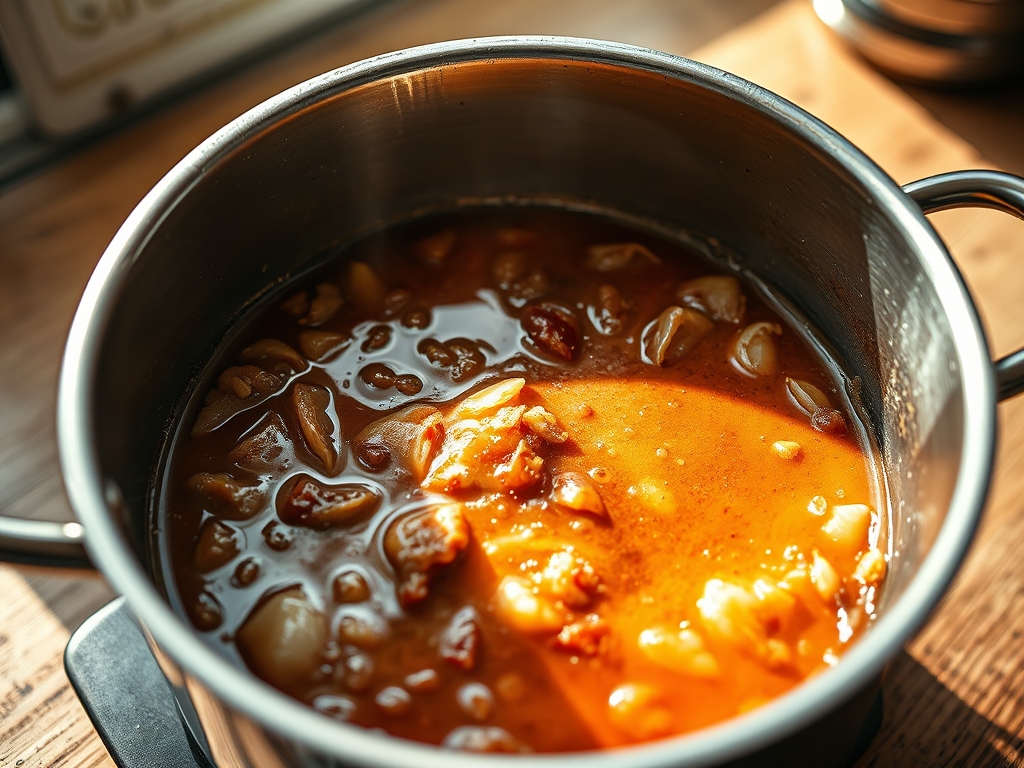
Step 4: The Deglaze and Infusion
Once all batches are seared and removed, the pan will be covered in "fond," those delicious browned bits. Pour in your bone broth and lemon juice. Use a wooden spatula to scrape the bottom of the pan, then pour this concentrated liquid over your resting chicken.
Pro Tip: This technique uses the broth to deglaze the pan, capturing the concentrated flavor of the Maillard reaction. This liquid acts as a protective barrier during storage, keeping the chicken moist during the reheating process.
Section B: Prep & Timing Fault-Lines:
The most common failure in Bulk Chicken Meal Prep is the "Carry-over Cooking" trap. If you pull the chicken off the heat at the exact target temperature, it will continue to rise by 5 to 10 degrees while resting, resulting in a dry product. Pull the chicken when a digital probe thermometer reads 160F (71C) for thighs. Another fault-line is the "Cooling Delay." Leaving five pounds of hot meat on the counter for two hours invites bacterial growth. Transition the chicken to shallow containers and refrigerate within 30 minutes to lock in the moisture and ensure safety.
THE VISUAL SPECTRUM
Section C: Thermal & Visual Troubleshooting:
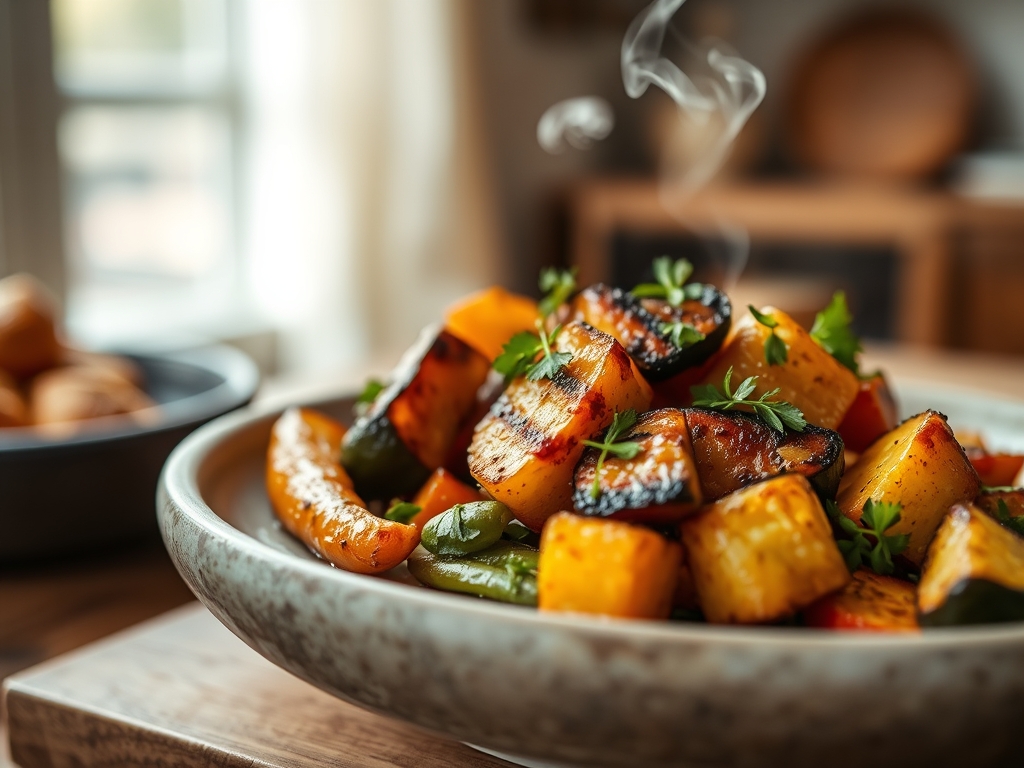
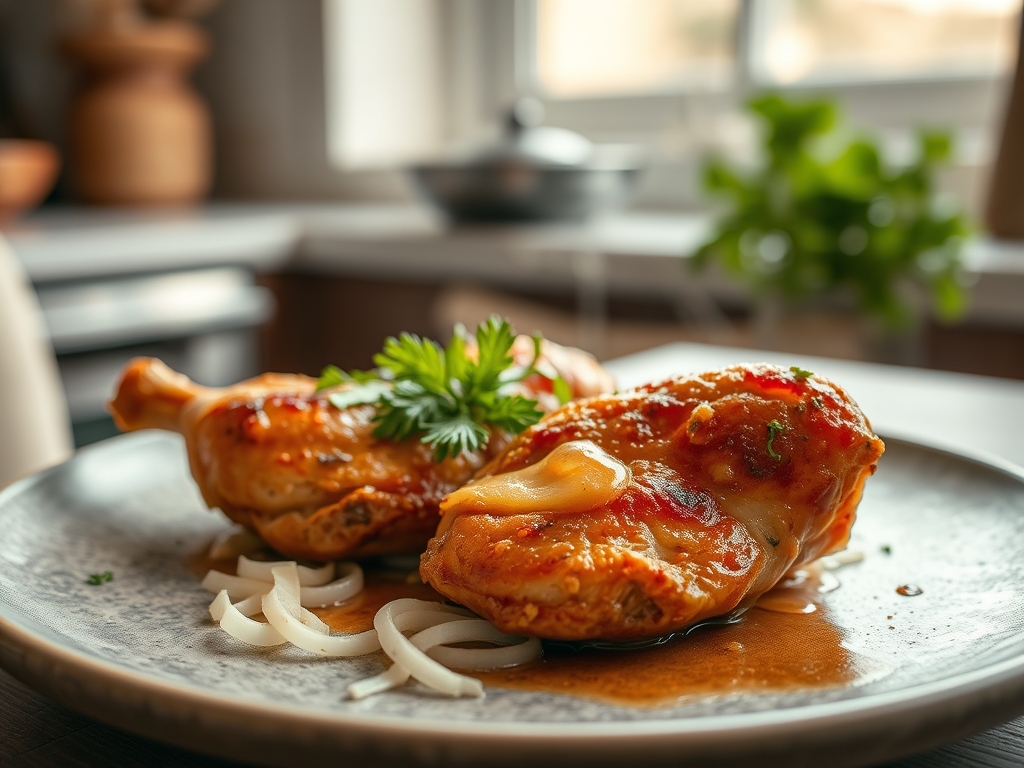
Referencing the Masterclass photo above, look for the "Deep Mahogany" hue on the surface of the thighs. If your chicken looks grey or beige, your pan temperature was too low or the meat was too wet. Use a paper towel to pat the meat bone-dry before seasoning. If the edges are burnt but the center is pink, your heat was too high; reduce the flame and use a lid for the final two minutes of cooking to circulate the heat. The "Visual Cue" of a successful prep is a glistening, viscous sheen on the meat, indicating that the fats have properly emulsified with the deglazing liquid.
THE DEEP DIVE
Macro Nutrition Profile
A standard 150g serving of this protocol yields approximately 32g of Protein, 12g of Fat, and 0g of Carbohydrates. By using thighs instead of breasts, you gain essential micronutrients like Zinc and Iron, along with a more robust flavor profile that survives the microwave.
Dietary Swaps
- Vegan: Replace chicken with extra-firm pressed tofu or seitan chunks. Use vegetable broth and a splash of liquid smoke to mimic the rendered depth of the poultry.
- Keto: This recipe is inherently Keto-compliant. Increase the fat content by adding a tablespoon of grass-fed butter to the deglazing step.
- GF: Ensure your spices are certified gluten-free and use a GF-certified bone broth.
Meal Prep & Reheating Science
When you reheat chicken, the water molecules vibrate and evaporate, which can tighten the protein fibers into a rubbery texture. To prevent this, always reheat with a tablespoon of water or broth and cover the container. This creates a steam chamber that re-hydrates the protein structure rather than drying it out further.
THE KITCHEN TABLE
How long does this stay fresh in the fridge?
When stored in airtight containers at or below 40F (4C), this chicken remains optimal for four days. For longer storage, freeze in individual portions. The deglazing liquid will protect the fibers from freezer burn.
Can I use chicken breasts instead?
Yes, but the margin for error is much smaller. Breasts lack the intramuscular fat of thighs, making them prone to drying out. Reduce the cooking time by 20% and ensure a 10-minute rest before slicing to retain juices.
Why is my chicken rubbery after reheating?
You likely overcooked it during the initial prep or used too much heat during the microwave cycle. Use 50% power on your microwave and add a splash of moisture to maintain the delicate molecular structure of the meat.
What is the best way to slice for salads?
Always slice against the grain. Look for the direction of the muscle fibers and cut perpendicular to them. This shortens the fibers, making each bite significantly more tender and easier to masticate.