Listen closely because your stovetop is currently a theater of thermal physics and you are the lead engineer. Most home cooks treat the humble potato dumpling like a soggy afterthought; they boil it into a gummy, translucent oblivion that lacks structural integrity. We are here to end that cycle of culinary negligence. The One Skillet Gnocchi protocol is not just a recipe; it is a high-stakes exercise in Maillard-driven crust development and emulsification. We are bypassing the boiling water entirely. Why? Because water is the enemy of texture. By introducing raw gnocchi directly to a hot, fat-slicked surface, we initiate a rapid dehydration of the surface starch. This creates a golden, shatter-crisp exterior while the interior remains pillowy and aerated. You want that piquant snap of a seared edge followed by a cloud-like center. This is about managing the infrastructure of heat, ensuring every millimeter of the pan is working to render fat and infuse aromatics into the very soul of the dough.
THE DATA MATRIX
| Metric | Specification |
|---|---|
| Prep Time | 10 Minutes |
| Execution Time | 15 Minutes |
| Yield | 4 Servings |
| Complexity (1-10) | 3 |
| Estimated Cost per Serving | $2.75 USD |
THE GATHERS
Ingredient Protocol:
- 500g / 1.1 lbs Shelf-stable or fresh potato gnocchi
- 30ml / 2 tbsp Extra virgin olive oil
- 45g / 3 tbsp Unsalted butter (high butterfat preferred)
- 4 cloves Fresh garlic, microplaned
- 200g / 7 oz Cherry tomatoes, halved
- 120ml / 0.5 cup Heavy cream or full-fat coconut milk
- 60g / 2 oz Fresh baby spinach
- 50g / 0.5 cup Freshly grated Parmesan cheese
- 5ml / 1 tsp Red pepper flakes
- 3g / 0.5 tsp Flaky sea salt
Section A: Ingredient Quality Audit:
If your gnocchi feels rubbery straight out of the vacuum seal, do not panic. This is often a result of compressed starches during industrial packaging. To fix this, gently massage the package before opening to break the vacuum seal and allow the dumplings to aerate. If your cherry tomatoes are out of season and lack that viscous, sugary pop, toss them in a pinch of granulated sugar and a drop of balsamic vinegar five minutes before cooking. This artificial maceration mimics the natural sweetness of a vine-ripened harvest. Finally, if using pre-shredded cheese, your sauce will likely break and become grainy due to anti-caking agents like potato starch or cellulose. Always grate your cheese from a block using a microplane to ensure a smooth, homogenous melt.
THE MASTERCLASS
1. Thermal Priming and Surface Prep
Set your heavy-bottomed stainless steel skillet or cast iron pan over medium-high heat. Add the olive oil. You are looking for the oil to shimmer and reach the "dancing" stage before the first dumpling touches the metal.
Pro Tip: Use an infrared thermometer to verify a surface temperature of 375 degrees Fahrenheit. This ensures immediate moisture evaporation upon contact, preventing the gnocchi from sticking to the pan's microscopic fissures. A professional offset spatula is your best friend here for initial movement.
2. The Golden Maillard Strike
Add the gnocchi in a single, even layer. Do not crowd the infrastructure. Let them sear undisturbed for 3 to 4 minutes until the bottom surface is deeply bronzed and crisp.
Pro Tip: This is "Total Surface Area Management." By not stirring immediately, you allow the starches to undergo the Maillard reaction, creating a flavor profile that boiling simply cannot achieve. A digital scale ensures your portions are even, preventing cold spots in the skillet.
3. Aromatic Infusion and Fat Rendering
Flip the gnocchi using a bench scraper or tongs. Drop in the butter and the halved tomatoes. As the butter begins to foam and turn nut-brown, the tomatoes will begin to blister and render their juices.
Pro Tip: The foaming butter is a visual cue that water is evaporating and milk solids are browning. This "beurre noisette" stage adds a toasted dimension to the One Skillet Gnocchi. Use a saucier-style whisking motion to coat every dumpling in the flavored fat.
4. Deglazing and Emulsification
Lower the heat to medium. Add the garlic and red pepper flakes, sautéing for only 30 seconds to avoid burning the delicate allicin compounds. Pour in the heavy cream. Use a wooden spoon to scrape up the "fond" (the brown bits) from the bottom of the pan.
Pro Tip: This is the deglazing phase. Those brown bits are concentrated umami. The cream acts as a stabilizer, picking up the fats and juices to create a viscous, luxurious sauce that clings to the textured surface of the gnocchi.
5. The Final Structural Integration
Fold in the baby spinach and the grated Parmesan. Stir gently until the spinach is just wilted and the cheese has vanished into the sauce. Season with flaky salt and a final crack of black pepper.
Pro Tip: Carryover heat is your primary tool here. Remove the pan from the burner while the spinach still looks slightly "underdone." The residual thermal energy in the sauce will finish the wilting process without turning the greens into a slimy mess.
Section B: Prep & Timing Fault-Lines:
The most common failure in One Skillet Gnocchi is the "Steam Trap." If you add the tomatoes too early, they release moisture that turns your sear into a braise, resulting in soggy dumplings. Always ensure your gnocchi have achieved a structural crust before introducing high-moisture vegetables. If your sauce becomes too thick or "tight," do not add more cream; instead, add a tablespoon of hot water or vegetable stock. This thins the emulsion without over-saturating the fat content, maintaining a silky mouthfeel.
THE VISUAL SPECTRUM
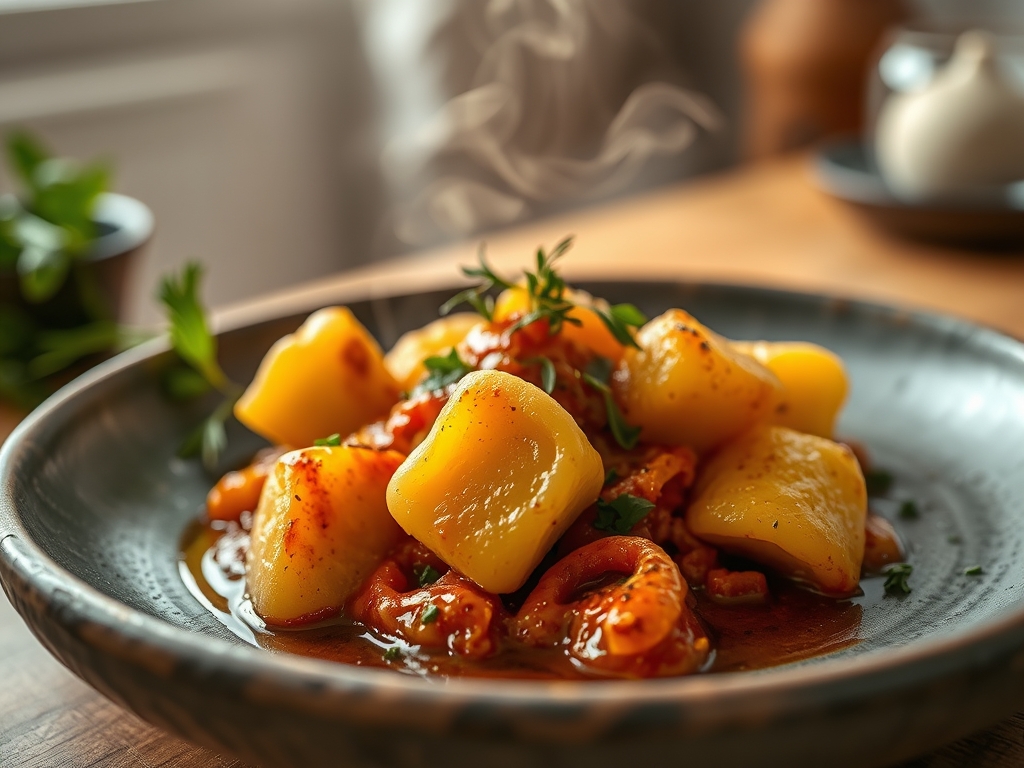
Section C: Thermal & Visual Troubleshooting:
Referencing the Masterclass photo, your goal is a high-contrast palette. If your dish looks monochromatic and beige, you have failed to properly blister the tomatoes or sear the dough. The photo shows distinct charred edges on the gnocchi; if yours are pale, increase your initial heat. If the sauce looks broken or oily, your heat was too high when adding the dairy, causing the fats to separate from the solids. To fix a broken sauce, whisk in a teaspoon of cold heavy cream off the heat to re-emulsify the mixture. The spinach should be a vibrant, electric green; if it is olive-drab, you have overcooked it through excessive thermal exposure.
THE DEEP DIVE
Macro Nutrition Profile:
A standard serving provides approximately 480 calories, 12g of protein, 58g of carbohydrates, and 24g of fat. While carb-heavy, the inclusion of fats and fiber from the spinach slows the glycemic response, providing more sustained energy than traditional pasta.
Dietary Swaps:
- Vegan: Replace butter with a high-quality vegan block butter and use full-fat coconut milk or cashew cream. Substitute Parmesan with nutritional yeast or a fermented nut-based cheese.
- Keto: This is a high-starch dish by nature. For a keto-adjacent version, swap potato gnocchi for cauliflower-based gnocchi, though the searing time will increase by 2 minutes to handle the higher moisture content.
- Gluten-Free: Ensure your gnocchi is labeled GF (usually made with corn or rice flour). These tend to be more fragile, so use a gentle hand during the searing phase.
Meal Prep & Reheating Science:
Gnocchi is notorious for "starching up" in the fridge. To reheat, avoid the microwave, which will turn the dumplings into rubber pellets. Instead, use a small skillet with a teaspoon of water and a lid. The steam will re-hydrate the starch molecules while the pan heat restores a semblance of the original crust.
THE KITCHEN TABLE
Can I use frozen gnocchi for this skillet method?
Yes, but do not thaw them first. Thawing creates a gummy exterior. Add them directly to the hot oil from the freezer; just be prepared for a bit more oil splattering as the ice crystals hit the fat.
Why is my garlic bitter?
You likely added it too early. Garlic has a low burn point. In a high-heat skillet environment, it only needs 30 to 60 seconds of exposure before the liquid components are added to buffer the temperature.
My gnocchi is sticking to the pan. Help!
This is a "Cold Bond" issue. Either your pan wasn't hot enough when you added the starch, or you tried to flip them before the Maillard crust had fully formed. Patience is a technical requirement for non-stick success.
What is the best pan for this?
A seasoned cast iron or a heavy stainless steel skillet is superior to non-stick. You want the surface tension and heat retention that only heavy metal provides to achieve that professional-grade sear and crust.