Listen to the rhythmic clack of steel against wood. That is the sound of a culinary architect at work. When you engage with Bench Scraper Dough, you are not merely mixing flour and water; you are managing a complex network of gluten proteins and hydration levels. The air in the kitchen becomes thick with the scent of fermented yeast and toasted grain. Your hands stay relatively clean because the tool does the heavy lifting. The bench scraper is the unsung hero of the high hydration world; it acts as an extension of your forearm to fold, shear, and tension the mass into submission. We are looking for that perfect windowpane stretch and a surface tension so tight it bounces back when poked. This is about precision. This is about the physics of elasticity versus extensibility. Forget the messy knuckle-deep struggle of the past. We are here to audit your process and streamline your workflow into a high-performance gluten manufacturing plant. Let us dive into the technical specifications of the perfect loaf.
THE DATA MATRIX
| Metric | Specification |
|---|---|
| Prep Time | 20 Minutes |
| Execution Time | 4 Hours (Bulk Fermentation Included) |
| Yield | 2 Standard Boules |
| Complexity (1-10) | 7 |
| Estimated Cost per Serving | $0.45 |
THE GATHERS
Ingredient Protocol:
- 500g / 3.75 cups High-Protein Bread Flour
- 375ml / 1.5 cups Filtered Water (90 degrees Fahrenheit)
- 10g / 2 teaspoons Fine Sea Salt
- 5g / 1.5 teaspoons Instant Dry Yeast
- 15ml / 1 tablespoon Extra Virgin Olive Oil (for bowl lubrication)
Section A: Ingredient Quality Audit:
If your flour has a protein content below 12 percent, your Bench Scraper Dough will lack the structural integrity to hold its shape; it will spread like a pancake rather than rising vertically. To fix this, substitute 50g of the flour with Vital Wheat Gluten. If your water is heavily chlorinated, it can inhibit yeast activity. Use a carbon filter or let the water sit out for two hours to dissipate the chemicals. If your yeast is sluggish, perform a bloom test in warm water with a pinch of sugar; if it does not aerate and foam within ten minutes, discard it. Low-quality salt with anti-caking agents can also affect the ionic bonding of the gluten; always opt for pure sea salt or kosher salt for the cleanest chemical reaction.
THE MASTERCLASS
1. The Initial Hydration Phase
Combine your flour and water in a large stainless steel bowl. Use a sturdy spatula to mix until no dry pockets remain. Cover and let rest for 30 minutes. This is the autolyse phase, where the flour fully absorbs the liquid and enzymes begin breaking down starches into simple sugars.
Pro Tip: Use a digital scale for this step. Volumetric measurements are notoriously inaccurate; a "cup" of flour can vary by 20 percent depending on how tightly it is packed. Precision is the foundation of consistency.
2. Salt and Yeast Integration
Sprinkle the salt and yeast over the shaggy mass. Instead of using your hands, use your bench scraper to cut the salt into the dough. Fold the edges over the center, rotating the bowl as you go. This ensures even distribution without prematurely exhausting the dough.
Pro Tip: The salt regulates yeast fermentation. Without it, the yeast would consume the sugars too quickly, leading to a weak structure and a pale crust. The bench scraper keeps the dough cool by minimizing hand contact.
3. The Bench Fold Technique
Turn the dough onto a clean, un-floured work surface. Use the bench scraper to reach under the dough, lift it, and fold it over itself. Repeat this rhythmic motion for 5 to 10 minutes. You will see the texture transition from a viscous mess to a smooth, elastic membrane.
Pro Tip: This is mechanical gluten development. By shearing the dough against the table, you are aligning protein strands. The bench scraper allows you to handle high-hydration dough that would otherwise stick to your skin.
4. Bulk Fermentation and Tensioning
Place the dough in a lightly oiled container. Every 30 minutes, perform a "stretch and fold" using the scraper. After two hours, the dough should have doubled in size and show visible air bubbles. Turn it out and use the scraper to tuck the edges under, creating a tight skin on the top.
Pro Tip: Surface tension is vital for the "oven spring." If the skin is too loose, the gases will escape sideways. A sharp bench scraper provides the leverage needed to pull the dough across the table to create that tension.
5. The Final Proof and Score
Place the shaped dough into a proofing basket. Once it passes the "poke test" (the indentation fills back slowly), flip it onto a baking stone. Use a lame or a very sharp knife to score the surface. This directs the expansion of the bread during the initial blast of heat.
Pro Tip: Steam is your best friend during the first 10 minutes of baking. It keeps the surface supple, allowing for maximum expansion before the crust hardens. Use a saucier to pour hot water into a preheated tray at the bottom of the oven.
Section B: Prep & Timing Fault-Lines:
The most common failure in Bench Scraper Dough is thermal mismanagement. If your kitchen is below 68 degrees Fahrenheit, fermentation will stall. Use an oven with the light turned on as a makeshift proofing box. Conversely, if the dough is over-proofed, the gluten network will collapse under its own weight. If you miss your window, do not try to shape it; instead, pour it into a well-oiled focaccia pan and bake it flat to save the batch.
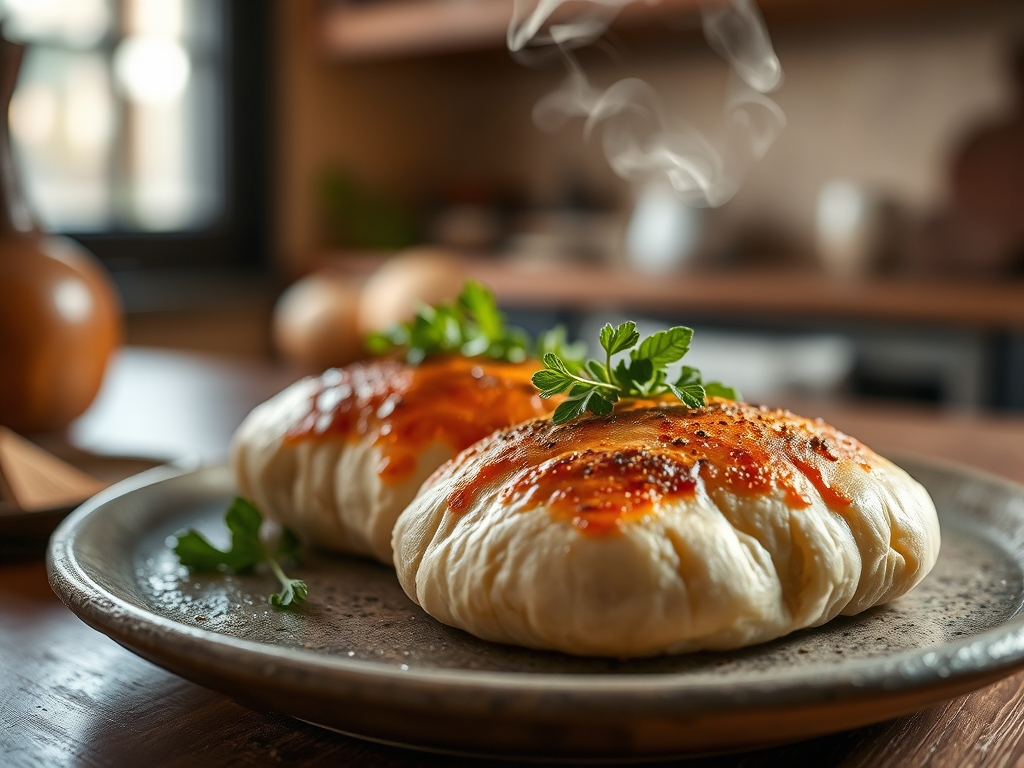
THE VISUAL SPECTRUM
Section C: Thermal & Visual Troubleshooting:
Referencing the Masterclass photo, your goal is a caramelized crust with a distinct "ear" where the score was made. If your bread is dull and gray, you likely under-baked it or lacked sufficient steam. If the bottom is burnt while the top is pale, move your baking stone to a higher rack. An uneven crumb (large holes at the top, dense at the bottom) indicates poor degassing during the shaping phase. Ensure you are using the bench scraper to distribute the gas pockets evenly before the final proof. If the dough does not hold its shape and flattens out, your gluten development was insufficient; increase the number of folds in Step 3.
THE DEEP DIVE
Macro Nutrition Profile:
A single serving (approx. 50g) contains roughly 130 calories, 4g of protein, 25g of carbohydrates, and 0.5g of fat. This is a high-glycemic fuel source, perfect for post-workout recovery or as a vehicle for healthy fats like avocado or olive oil.
Dietary Swaps:
- Vegan: This recipe is naturally vegan. Ensure your flour is not fortified with animal-derived D3.
- Keto: Substitute bread flour with a mix of almond flour, vital wheat gluten, and oat fiber. Note that the bench scraper technique will require more "smearing" than folding.
- Gluten-Free: This specific technique relies on gluten. For GF, use a high-quality 1-to-1 blend and add 10g of psyllium husk to mimic the elasticity.
Meal Prep & Reheating Science:
To maintain the molecular structure, do not refrigerate bread; this accelerates staling through starch retrogradation. Freeze sliced bread in airtight bags. To reheat, toast directly from frozen to infuse heat rapidly, which re-gelatinizes the starches and restores the crispy exterior without drying out the crumb.
THE KITCHEN TABLE
Why is my dough sticking to the scraper?
The scraper should be kept slightly damp or very lightly floured. If the dough is too viscous, use a quick, decisive motion. Hesitation allows the proteins to bond with the metal surface. Speed is your ally.
Can I use a food processor instead?
You can, but you lose the tactile feedback. A processor can easily over-knead the dough, breaking the gluten strands you worked so hard to build. The bench scraper method ensures you never over-work the protein network.
How do I get a shinier crust?
Brush the dough with a light water mist just before it enters the oven. The moisture dissolves surface sugars, which then render into a thin, glassy layer of caramel during the baking process.
My bread is too dense. What happened?
This is usually a hydration or timing issue. Ensure your water is at 90 degrees Fahrenheit. If the water is too cold, the yeast remains dormant; if it is too hot, you kill the culture. Check your measurements.
What is the best way to clean the scraper?
Never let dough dry on the tool. Rinse it with cold water immediately after use. Cold water prevents the gluten from "cooking" onto the metal, which makes it much easier to wipe clean with a standard sponge.