Listen closely because the stakes in your kitchen just hit fifteen pounds per square inch. We are not just boiling jars; we are managing a localized atmospheric event. Pressure Canner Safety is the thin line between a shelf-stable masterpiece and a kitchen renovation you did not plan for. Imagine the hiss of steam, the rhythmic dance of the weighted gauge, and the absolute structural integrity of a perfectly sealed jar of beef bourguignon. When you master the physics of the pressure vessel, you are not just a cook; you are a culinary engineer. We are looking for total microbial annihilation while preserving the delicate molecular architecture of our ingredients. This is about the violent, beautiful transition of raw proteins and starches into a preserved state that defies the passage of time. If you respect the gauge, the gasket, and the vent pipe, you unlock a world of flavor that is shelf-stable for years. Let us dive into the technical audit of the most powerful tool in your pantry arsenal.
THE DATA MATRIX
| Metric | Specification |
|---|---|
| Prep Time | 45 Minutes |
| Execution Time | 90 Minutes (Processing) |
| Yield | 7 Liters / 7 Quarts |
| Complexity (1-10) | 8 |
| Estimated Cost per Serving | $2.45 |
THE GATHERS
Ingredient Protocol:
- 2.3 kg / 5 lbs Lean Beef Chuck (1-inch cubes)
- 1.4 kg / 3 lbs Yukon Gold Potatoes (peeled and diced)
- 900g / 2 lbs Carrots (sliced into rounds)
- 450g / 1 lb Yellow Onions (diced)
- 1.5L / 6 cups Beef Bone Broth (low sodium)
- 60ml / 4 tbsp Worcestershire Sauce
- 30g / 2 tbsp Sea Salt
- 10g / 2 tsp Black Pepper
- 5g / 1 tsp Dried Thyme
- 250ml / 1 cup Dry Red Wine (for deglazing)
Section A: Ingredient Quality Audit:
The primary failure point in high-pressure preservation is often the raw material. If your beef lacks sufficient connective tissue, the high-heat environment will turn it into sawdust. Conversely, excessive fat will go rancid or interfere with the lid seal. Trim all exterior fat to ensure a clean seal. If your vegetables appear wilted, they lack the turgor pressure necessary to withstand the retort process; they will disintegrate into a muddy slurry. Fix this by shocking produce in an ice bath for twenty minutes prior to dicing to restore cellular rigidity. If your broth is too salty, the reduction during the canning process will result in an inedible, hyper-saline product. Always use unsalted stocks and control the sodium manually with a digital scale.
THE MASTERCLASS
1. The Maillard Foundation
Begin by searing your beef cubes in a heavy-bottomed saucier or cast iron skillet. You are looking to render the surface fats and initiate the Maillard reaction, creating a complex flavor profile that will infuse the entire jar. Do not crowd the pan; work in batches to maintain high surface temperatures.
Pro Tip: Use a bench scraper to efficiently move seared meat into a large mixing bowl. The science here is simple: browning creates melanoidins which provide the deep, savory "umami" profile that survives the high-pressure environment better than raw meat flavors.
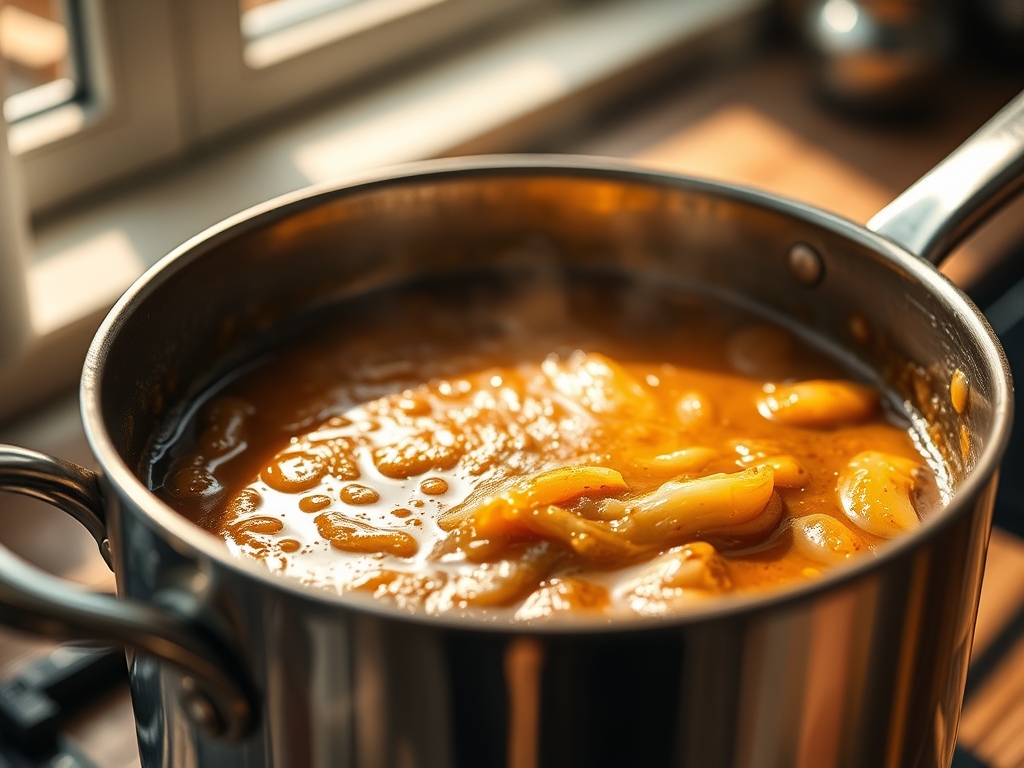
2. Deglaze and Aerate
Once the meat is seared, pour your red wine into the hot pan. Use a wooden spatula to scrape up the fond. This is the "liquid gold" of your recipe. Allow the alcohol to evaporate slightly to aerate the harsher notes, leaving only the fruit and acid.
Pro Tip: Use a digital thermometer to ensure your deglazing liquid reaches at least 180 degrees Fahrenheit before adding it to the jars. This maintains the "hot pack" temperature requirements essential for Pressure Canner Safety.
3. The Assembly Matrix
In a large bowl, toss your raw vegetables with the seared meat, salt, pepper, and thyme. Pack the mixture into sterilized jars, leaving exactly one inch of headspace. This gap is critical; it allows for the expansion of gases and liquids during the vacuum-sealing phase.
Pro Tip: Use a non-metallic bubble remover tool to slide down the sides of the jar. This releases trapped air pockets that could expand and cause "siphoning," where liquid is forced out of the jar, compromising the seal.
4. Atmospheric Calibration
Place your jars in the canner with two to three inches of simmering water. Secure the lid. Turn the heat to high and allow a steady stream of steam to vent from the pipe for a full ten minutes. This exhausts the air, ensuring the internal environment is pure steam, which conducts heat more efficiently than an air-steam mix.
Pro Tip: This is the most critical phase of Pressure Canner Safety. If you do not vent the air, your gauge may read the correct pressure, but the internal temperature will be too low to kill botulism spores.
5. The Pressure Descent
After the processing time is complete, turn off the heat and walk away. Do not touch the weight. Do not nudge the lid. Let the pressure drop naturally to zero. Forced cooling causes "thermal shock," which can lead to jar breakage or liquid loss.
Pro Tip: Use a timer to track the cooling phase. A natural depressurization usually takes 30 to 45 minutes for a full load of quart jars. Patience is a safety requirement.
Section B: Prep & Timing Fault-Lines:
The most common human error is "rushing the vent." If you apply the weight before the ten-minute vent is complete, you trap cold air pockets. This results under-processed food. Another fault-line is inconsistent dicing. If your potatoes are vastly different sizes, the smaller pieces will turn to starch-glue while the larger ones remain structurally sound. Use a mandoline or a sharp chef knife and a ruler to ensure uniformity. Finally, failing to wipe the jar rims with white vinegar is a recipe for seal failure; even a microscopic speck of fat will prevent the plastisol gasket from bonding to the glass.
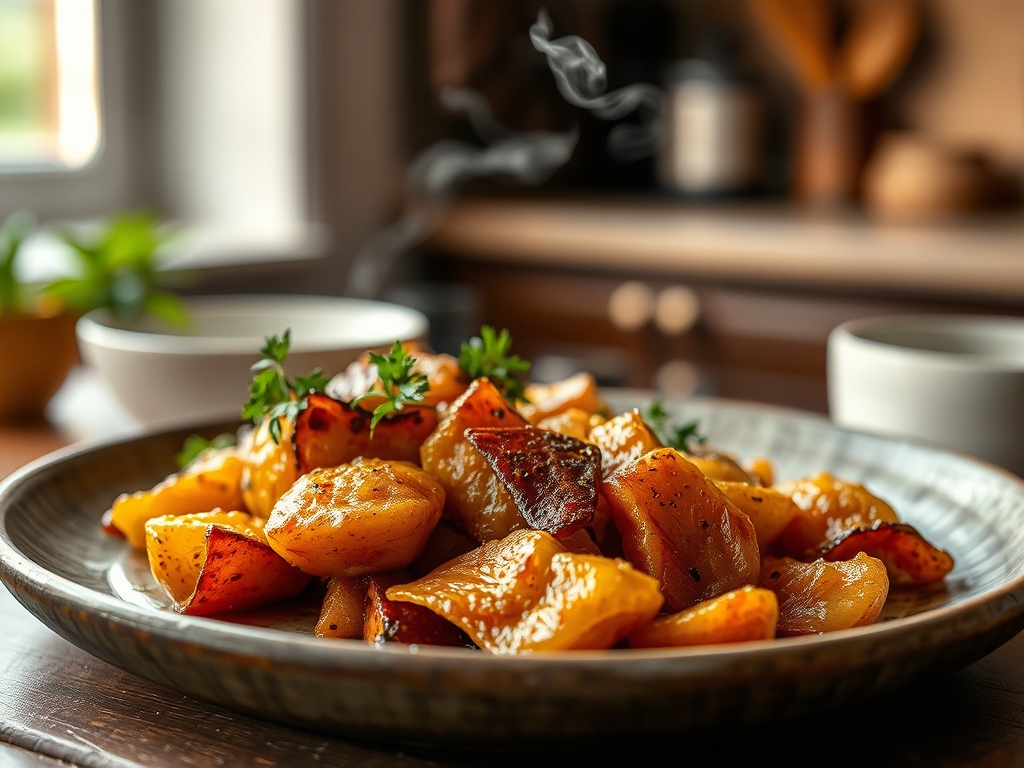
THE VISUAL SPECTRUM
Section C: Thermal & Visual Troubleshooting:
Look at the Masterclass photo above. Notice the clarity of the liquid and the distinct edges of the vegetables. If your jars appear cloudy, you likely used "table salt" with anti-caking agents instead of pure canning salt; those additives precipitate out and create a muddy look. If your meat looks gray and unappealing, you skipped the searing step. If the liquid level in the jar has dropped significantly (siphoning), you likely fluctuated the heat too much during processing or cooled the canner too quickly. The ideal visual cue is a viscous, clear broth surrounding vibrant, intact chunks of produce with a vacuum-depressed lid that does not move when pressed.
THE DEEP DIVE
Macro Nutrition Profile:
Each 500ml serving provides approximately 350 calories, 35g of protein, 22g of carbohydrates, and 12g of fat. The high protein content comes from the lean chuck, while the Yukon Golds provide complex carbohydrates that hold their shape under pressure.
Dietary Swaps:
- Vegan: Replace beef with hearty mushrooms (Portobello or Shiitake) and use a mushroom-based broth. Increase the thyme and add a splash of soy sauce for piquant depth.
- Keto: Omit the potatoes and carrots. Substitute with radishes (which lose their bite and mimic potatoes when canned) and celery.
- GF: This recipe is naturally gluten-free, provided your Worcestershire sauce is a certified brand.
Meal Prep & Reheating Science:
When reheating, do not boil the life out of it. Heat gently in a saucier over medium heat. The starches in the potatoes have already been gelatinized; high-intensity stirring will break them down and make the stew unpleasantly thick. Reheat to 165 degrees Fahrenheit to ensure food safety while maintaining the molecular integrity of the meat fibers.
THE KITCHEN TABLE
Why is my pressure gauge vibrating?
A slight jiggle is normal for weighted gauges; it indicates the internal pressure has overcome the weight of the regulator. If it is dancing violently, your heat is too high. Lower the flame to maintain a steady, rhythmic "hiss-jiggle."
Can I use a pressure cooker instead?
No. Standard pressure cookers heat up and cool down too quickly, which can result in under-processing. Pressure Canner Safety requires the specific thermal mass and regulated cooling curve of a dedicated pressure canning vessel.
Why did my jars not seal?
The most likely culprits are chipped jar rims, fat residue on the rim, or failing to leave the proper one-inch headspace. Always wipe rims with vinegar and check for nicks before filling.
Is it safe to eat if the liquid is low?
As long as the jar is sealed and you followed the correct processing time and pressure, the food is safe. However, any food protruding above the liquid line may discolor over time due to oxidation.
How do I know if botulism is present?
You cannot see, smell, or taste botulism. This is why following tested recipes and Pressure Canner Safety protocols is non-negotiable. If a lid is bulging or the seal is broken, discard the contents immediately.