Forget your high speed electric blades and their sterile, uniform destruction of cellular integrity. If you want to unlock the true genetic potential of a peppercorn or a cumin seed, you must embrace the brutal, primitive efficiency of the Mortar and Pestle Grind. We are not merely breaking spices; we are conducting a technical audit of volatile oils. When you use a motorized blade, the friction generates localized heat that prematurely vaporizes the delicate terpenes you actually want on the plate. By contrast, the manual abrasion of stone against stone shears the cell walls of the spice, forcing the aromatic compounds to emulsify into a viscous paste rather than scattering into the exhaust fan of a food processor. This is the difference between a flat, one dimensional heat and a three dimensional sensory assault. We are looking for that piquant release, that sudden cloud of scent that signals the successful rupture of the spice's oil glands. It is tactile, it is loud, and it is the only way to achieve a professional grade flavor profile.
THE DATA MATRIX
| Metric | Specification |
|---|---|
| Prep Time | 15 Minutes |
| Execution Time | 25 Minutes |
| Yield | 4 Servings |
| Complexity (1-10) | 4 |
| Estimated Cost per Serving | $4.50 |
THE GATHERS
Ingredient Protocol:
- 500g / 1.1 lbs Bone-in Chicken Thighs (Skin-on)
- 15ml / 1 tbsp Whole Black Peppercorns
- 10g / 2 tsp Coarse Sea Salt
- 45ml / 3 tbsp Extra Virgin Olive Oil
- 4 Cloves Fresh Garlic
- 5g / 1 tsp Cumin Seeds
- 250ml / 1 cup Chicken Bone Broth
- 30ml / 2 tbsp Cold Unsalted Butter
Section A: Ingredient Quality Audit:
Sub-par raw materials will tank your audit faster than a broken refrigerator. If your peppercorns lack that signature piquant punch, they have likely oxidized. To fix this, briefly render the moisture out by dry-toasting them in a stainless steel pan for sixty seconds before the grind. If your garlic cloves are sprouting green "hearts," remove the germ; that bitter sprout will ruin the infuse stage of your fat. Always ensure your salt is coarse. Fine table salt lacks the abrasive geometry required to help the pestle grip the spices during the initial breakdown.
THE MASTERCLASS
1. The Primary Abrasion Phase
Place your dry spices and coarse salt into the mortar. Begin with a firm, vertical tamping motion to crack the outer husks before transitioning to a circular, shearing motion. You are looking for a heterogeneous texture where some larger shards remain to provide a textural pop.
Pro Tip: Use a digital scale to measure your spices by weight rather than volume. This ensures consistent salinity and heat levels across every batch you produce, regardless of the spice's density.
2. The Aromatics Integration
Add the garlic cloves to the dry spice mixture. Use the pestle to crush the garlic into the salt and spice "sand." The salt acts as a secondary abrasive, turning the garlic into a smooth, viscous paste that holds the volatile oils in suspension.
Pro Tip: Use a bench scraper to clean the sides of your mortar. This ensures every milligram of the aromatic paste is utilized, preventing flavor loss during the transfer to the cooking vessel.
3. Searing and Rendering
Heat your olive oil in a heavy bottomed saucier until it reaches the shimmering point. Place the chicken skin side down. Do not move it. You are waiting for the Maillard reaction to create a deep, golden crust.
Pro Tip: Use an infrared thermometer to ensure your pan surface is at least 375 degrees Fahrenheit. Anything lower will result in "stewing" rather than searing, which prevents the skin from becoming crisp.
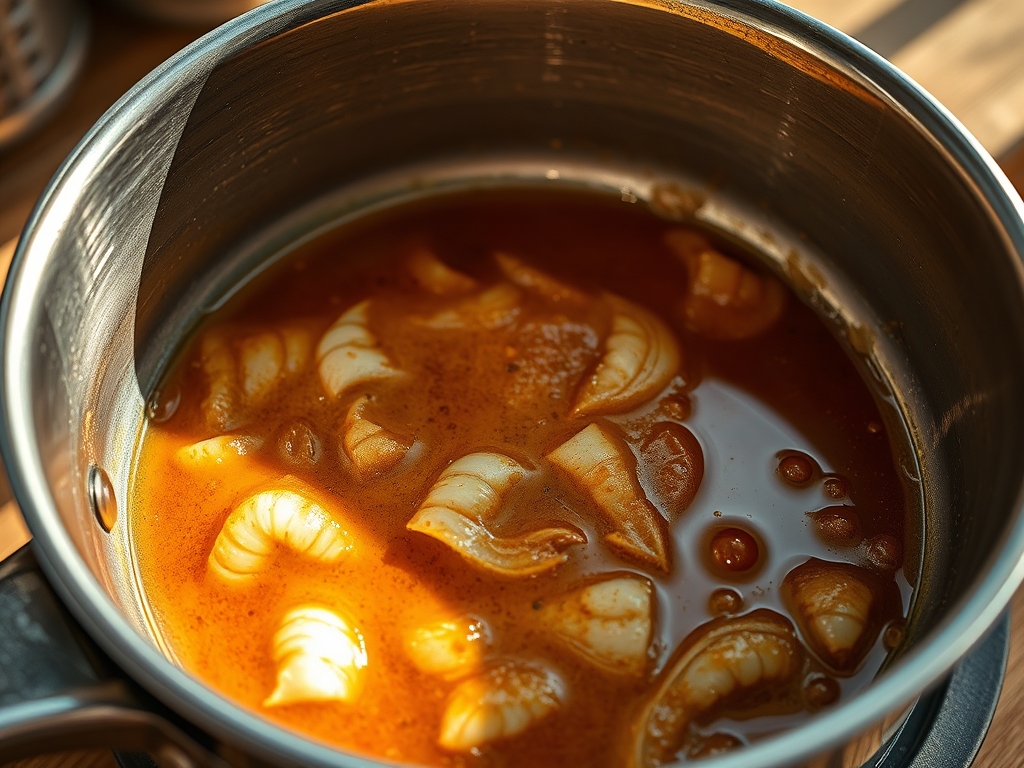
4. Deglaze and Emulsify
Once the chicken is seared, remove it and add your spice paste to the remaining fat for thirty seconds. Immediately add the bone broth to deglaze the pan, scraping up the browned bits. Return the chicken to the pan and simmer until the internal temperature hits 165 degrees Fahrenheit.
Pro Tip: Finish the sauce by whisking in cold butter off the heat. This creates a stable emulsion that coats the palate and carries the spice notes more effectively than a water based sauce.
Section B: Prep & Timing Fault-Lines:
The most common failure in this protocol is "crowding the pan." If you add too much protein at once, the temperature drops, and the chicken releases moisture that steams the meat instead of searing it. Work in batches if necessary. Furthermore, if you burn the spice paste during the thirty second "bloom" phase, discard it and start over. Burnt garlic is an irreversible chemical error that will permeate the entire dish with acridity.
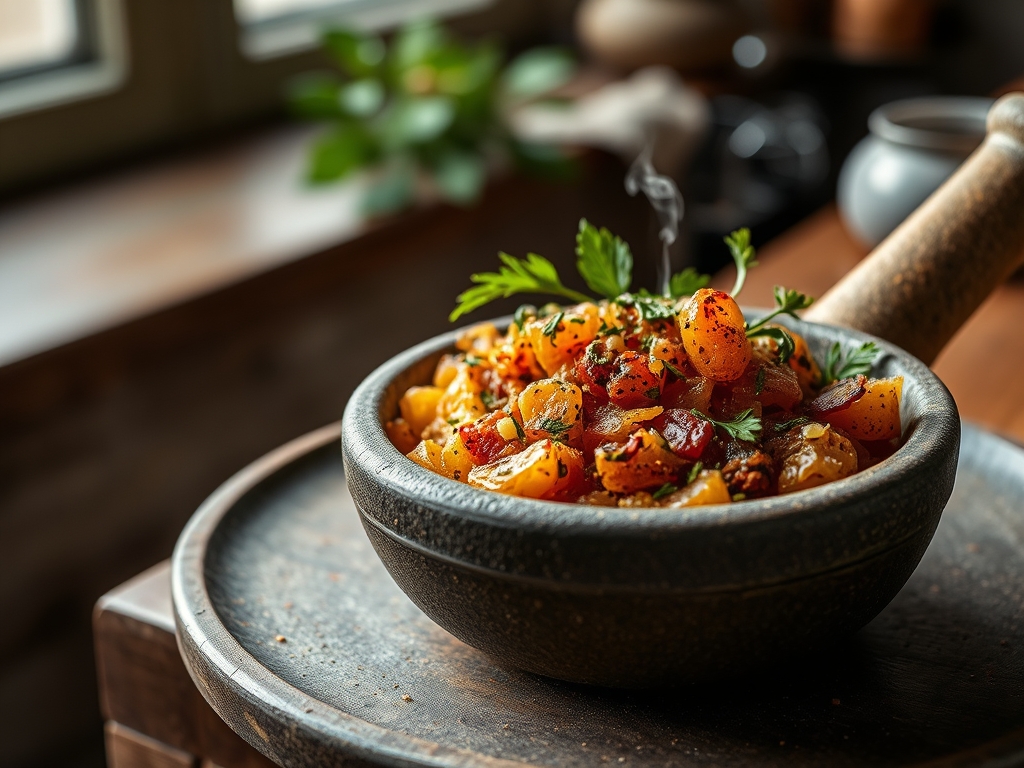
THE VISUAL SPECTRUM
Section C: Thermal & Visual Troubleshooting:
Look at the Masterclass photo above. Notice the deep, mahogany hue of the chicken skin; this is the visual indicator of successful protein denaturation. If your chicken looks pale or "rubbery," your heat was too low. If the sauce appears broken or oily rather than creamy, you failed to aerate the butter properly during the final whisking phase. The spice particles should be visible but suspended evenly throughout the liquid. If they have all sunk to the bottom, your sauce lacks the necessary viscosity to hold the solids in suspension.
THE DEEP DIVE
Macro Nutrition Profile:
Each serving provides approximately 32g Protein, 22g Fat, and 3g Carbohydrates. The caloric density is roughly 340 calories per serving, depending on the specific fat content of the chicken thighs used.
Dietary Swaps:
- Vegan: Substitute chicken with thick slices of cauliflower "steak" and use vegetable broth with a vegan butter alternative.
- Keto: This recipe is naturally keto compliant. Ensure the bone broth has no added sugars.
- GF: The recipe is naturally gluten free; just verify the bone broth is certified.
Meal Prep & Reheating Science:
To maintain the molecular structure when reheating, avoid the microwave. The high frequency waves cause the fat to separate from the sauce. Instead, reheat gently in a small pan over low heat, adding a splash of water or broth to re-emulsify the sauce as it warms. This preserves the viscous mouthfeel of the original preparation.
THE KITCHEN TABLE
Why is my spice paste turning gray?
This usually happens when using a volcanic rock mortar that hasn't been seasoned. The stone dust mixes with the oils. Ensure your equipment is properly cured with rice and salt before its first professional use.
Can I use pre-ground pepper?
Absolutely not. Pre-ground pepper has already lost its volatile aromatics to oxidation. It provides heat but lacks the floral, woody complexity required for a successful Mortar and Pestle Grind audit.
My sauce is too thin, how do I fix it?
Continue to simmer the liquid to render out excess water. As the water evaporates, the concentration of proteins and fats increases, naturally thickening the sauce without the need for starch based thickeners.
How do I know when the spices are "done" grinding?
Stop when the aroma fills the room and the mixture looks like wet sand. You want a variety of particle sizes to ensure a complex release of flavors during the cooking process.