Listen to the sound of a high-performance kitchen at 6:00 AM. It is not the sound of delicate whisks; it is the roar of the exhaust hood and the rhythmic percussion of stainless steel. If you are serious about your physiological output, you treat your kitchen like a fulfillment center. We are not just making dinner; we are executing Ground Turkey Prep at a scale that would make a logistics manager weep with joy. Ground turkey is the ultimate blank slate of the protein world. It is lean, mean, and notoriously difficult to master because of its low fat content. Without the right infrastructure, you end up with a pile of gray, desiccated pebbles that taste like disappointment. With the right protocol, you transform this humble bird into a savory, maillard-reacted masterpiece. We are looking for that perfect balance of moisture retention and aggressive browning. We want every gram of protein to be infused with aromatic depth. This is where high-level culinary engineering meets your weekly macro goals. Strap in; we are about to optimize your protein supply chain.
THE DATA MATRIX
| Metric | Specification |
|---|---|
| Prep Time | 15 Minutes |
| Execution Time | 25 Minutes |
| Yield | 8 Servings (approx. 150g per serving) |
| Complexity (1-10) | 3 |
| Estimated Cost per Serving | $1.75 |
THE GATHERS
Ingredient Protocol:
- Lean Ground Turkey (93/7): 1.36kg / 3 lbs
- Neutral High-Smoke Point Oil (Avocado or Grapeseed): 30ml / 2 tbsp
- Kosher Salt: 15g / 1 tbsp
- Smoked Paprika: 10g / 1.5 tbsp
- Granulated Garlic: 8g / 1 tbsp
- Ground Cumin: 5g / 1 tsp
- Low-Sodium Chicken Bone Broth: 120ml / 0.5 cup
- Fresh Cilantro (finely minced): 30g / 0.25 cup
Section A: Ingredient Quality Audit:
If your turkey arrives in a "chub" (that plastic-wrapped tube), it often has a higher water content and a finer grind. This leads to a viscous texture that resists browning. To fix this, pat the meat dry with paper towels before it hits the heat. If the meat smells slightly sulfurous but is within its expiration date, a quick rinse and dry can help, but generally, you want meat that smells like nothing at all. If your spices are older than six months, they have lost their piquant punch. Toast them in a dry pan for 30 seconds before adding them to the meat to wake up those dormant oils.
THE MASTERCLASS
Step 1: Thermal Priming and Surface Prep
Place your heavy-bottomed stainless steel skillet or a wide saucier over medium-high heat. Do not add the oil until the pan is hot. Use a digital scale to portion your turkey into manageable chunks. This ensures even cooking and prevents the pan temperature from crashing when the meat is introduced.
Pro Tip: This is about the Leidenfrost effect. If a drop of water dances on the surface of the pan, it is ready. This prevents the lean protein from bonding to the metal on a molecular level.
Step 2: The Initial Sear
Add the oil, then the turkey. Do not stir it immediately. Let it sit for at least three minutes to allow the Maillard reaction to occur. You are looking for a deep, golden-brown crust on the bottom. Use a bench scraper or a heavy wooden spoon to break the meat into large chunks, not tiny grains.
Pro Tip: Breaking the meat too early releases cellular moisture, which turns your sear into a steam. Patience is the primary ingredient in high-quality Ground Turkey Prep.
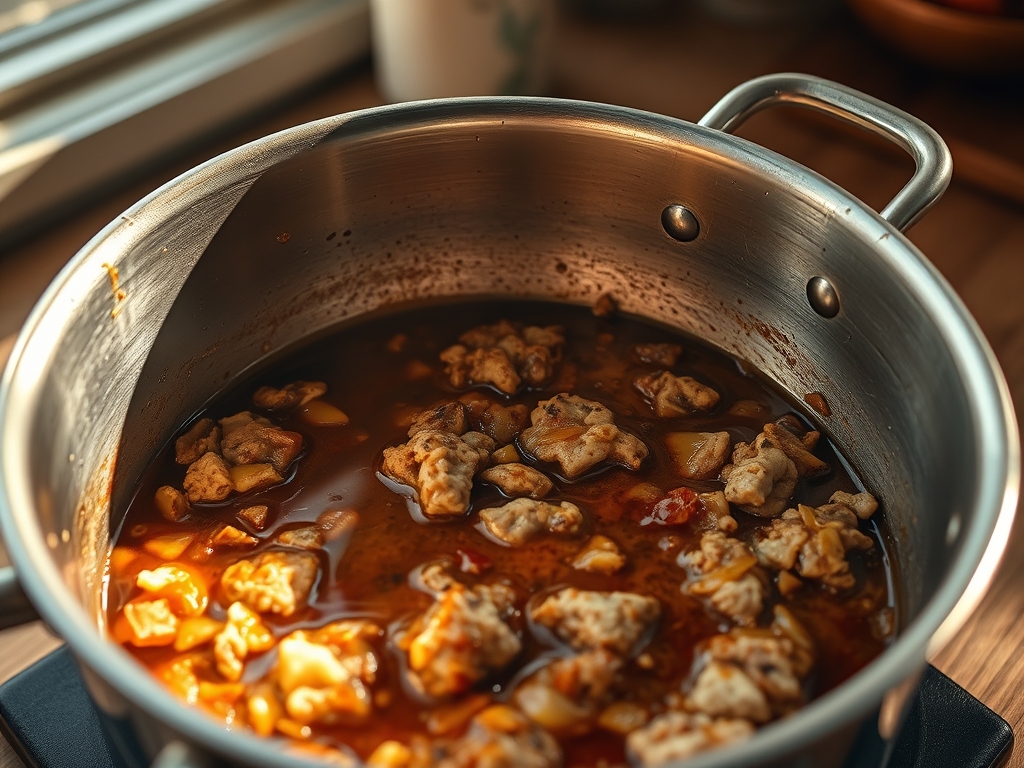
Step 3: Spice Infusion and Deglazing
Once you have significant browning, sprinkle your salt and spices evenly over the meat. Stir vigorously to coat. As the spices hit the hot fat, they will infuse the oil. Pour in the chicken bone broth to deglaze the pan, scraping up all those flavorful brown bits (the fond) from the bottom.
Pro Tip: The collagen in the bone broth acts as a natural emulsifier, creating a light sauce that clings to the meat rather than puddling at the bottom of your meal prep containers.
Step 4: Final Reduction and Aeration
Lower the heat to medium. Continue to toss the meat as the liquid reduces. You want the liquid to reach a viscous consistency that coats each piece of turkey. Just before removing from the heat, toss in the fresh cilantro to aerate the flavor profile with a hit of brightness.
Pro Tip: Use an instant-read thermometer to ensure the internal temperature has reached 74C (165F). Overcooking by even five degrees will result in a grainy, dry texture.
Section B: Prep & Timing Fault-Lines:
The biggest error in human timing is the "crowded pan" syndrome. If you try to cook 3 lbs of turkey in a small 10-inch skillet, you are making turkey soup, not browned turkey. Work in batches if necessary. Another fault-line is the "cold start." Taking turkey directly from a 35F refrigerator to a hot pan causes the muscle fibers to seize and squeeze out moisture. Let the meat sit at room temperature for 10 minutes to take the chill off.
THE VISUAL SPECTRUM
Section C: Thermal & Visual Troubleshooting:
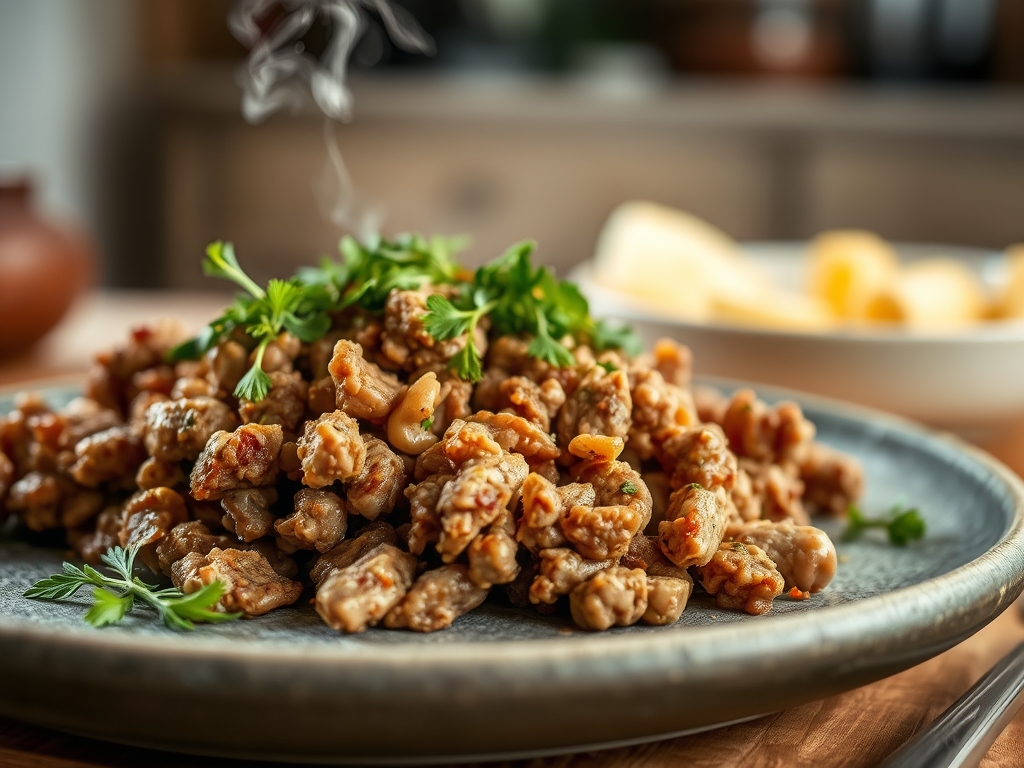
Look at the Masterclass photo. Notice the variation in color. You should see distinct patches of dark mahogany brown contrasted against the lighter tan of the cooked meat. If your turkey looks uniform and pale gray, you failed to reach the proper temperature before stirring. If the texture looks "mushy," you likely had too much liquid in the pan that did not reduce fast enough. The solution is to increase the surface area; use the largest pan you own. If the spices look black, you burnt them; next time, add them only after the meat has released some of its own moisture to act as a thermal buffer.
THE DEEP DIVE
Macro Nutrition Profile:
Per 150g serving, you are looking at approximately 220 calories, 32g of protein, 9g of fat, and 0g of carbohydrates. This makes it an elite-tier tool for body composition management. The high protein-to-calorie ratio provides significant satiety, making it easier to maintain a caloric deficit without sacrificing muscle mass.
Dietary Swaps:
- Vegan: Replace turkey with crumbled extra-firm tofu or tempeh. Increase the oil by 15ml to compensate for the lack of animal fat.
- Keto: Use 85/15 ground turkey for higher fat content and swap the bone broth for a splash of heavy cream to create a richer mouthfeel.
- GF: This protocol is naturally gluten-free, provided your chicken broth is certified.
Meal Prep & Reheating Science:
To maintain molecular structure during reheating, do not use a microwave on high power. This vibrates water molecules so violently that they tear through the protein fibers, leaving the meat dry. Instead, reheat in a covered skillet with a tablespoon of water or broth. This creates a steam-jacket effect that rehydrates the protein gently. If using a microwave, use 50 percent power in 60-second intervals.
THE KITCHEN TABLE
Why is my ground turkey always dry?
Turkey is extremely lean. Without the Maillard reaction and a liquid deglaze like bone broth, the moisture evaporates. Always finish with a small amount of liquid to create a moisture-retaining coating around the protein crumbles.
Can I use ground chicken instead?
Yes, the infrastructure is identical. However, ground chicken is often even more finely ground than turkey, so you must be extra vigilant about not over-stirring during the initial searing phase to avoid a paste-like consistency.
How long does this stay fresh?
When stored in an airtight container at 4C (40F), your prep will remain optimal for four days. For longer storage, freeze in individual portions. The high protein density allows it to thaw without losing significant structural integrity.
What is the best pan for this?
Cast iron or stainless steel is mandatory. Non-stick pans cannot safely reach the temperatures required for a proper sear without damaging the coating. A heavy pan also retains heat better when the cold meat is added.