Forget the thin, watery liquids masquerading as soup base in grocery store aisles. We are here to talk about liquid gold; a viscous, collagen-dense extraction that requires high-pressure physics to achieve perfection. When you commit to a batch of Instant Pot Bone Broth, you are not just cooking; you are performing a high-velocity mineral extraction. We are targeting the deep marrow and the connective tissues, forcing them to surrender their gelatinous secrets in a fraction of the traditional time. This is culinary engineering at its most efficient. The air in your kitchen should transform, heavy with the scent of roasted marrow and caramelized mirepoix. We want a finished product that wobbles like jelly when chilled, a testament to the structural integrity of the proteins we have successfully liberated. This is the foundation of every great sauce and restorative sip. If you are still simmering bones on a stovetop for twenty-four hours, you are living in the past. It is time to embrace the pressurized future of the modern kitchen laboratory.
THE DATA MATRIX
| Metric | Specification |
|---|---|
| Prep Time | 20 Minutes |
| Execution Time | 120 Minutes (High Pressure) |
| Yield | 2.8 Liters / 3 Quarts |
| Complexity (1-10) | 3 |
| Estimated Cost per Serving | $0.85 USD |
THE GATHERS
Ingredient Protocol:
- Beef or Chicken Bones (Roasted): 1.8 kg / 4 lbs
- Filtered Water: 2.8 Liters / 12 cups
- Apple Cider Vinegar: 30 ml / 2 tbsp
- Yellow Onions (Halved): 300g / 2 medium
- Carrots (Rough Chop): 200g / 3 large
- Celery Stalks (Rough Chop): 150g / 3 stalks
- Garlic Cloves (Smashed): 20g / 4-6 cloves
- Black Peppercorns: 5g / 1 tbsp
- Bay Leaves: 2 units
- Sea Salt: To taste (post-extraction)
Section A: Ingredient Quality Audit:
The primary failure point in any extraction is the quality of the raw substrate. If your bones are "clean" (stripped of all connective tissue), your broth will lack the necessary body. Technical Fix: Incorporate 500g of chicken feet or beef knuckles to increase the collagen density. If your vegetables appear wilted or oxidized, do not discard them; however, avoid using brassicas like broccoli or cabbage. These contain sulfur compounds that will infuse the broth with a bitter, unpleasant funk under high pressure. If the water source has high chlorine levels, it will chemically alter the flavor profile. Always use filtered water to ensure a neutral canvas for the marrow flavors to shine.
THE MASTERCLASS
Step 1: The Maillard Initiation
Place your bones on a heavy-duty roasting pan and blast them at 200C (400F) for 25 minutes. We are looking for deep mahogany browning, not carbonization. Use a bench scraper to remove the bones from the pan once finished.
Pro Tip: The Maillard reaction creates complex flavor molecules that cannot be replicated through boiling alone. This step ensures the finished broth has a rich, roasted depth rather than a flat, raw taste.
Step 2: The Deglaze Protocol
Transfer the hot bones to the Instant Pot liner. Place the roasting pan over a burner and add 250ml of water. Use a wooden spatula to deglaze the fond (the brown bits) from the bottom of the pan. Pour this "liquid gold" into the pot.
Pro Tip: The fond contains concentrated umami. Utilizing a saucier or a wide pan for roasting increases the surface area for this flavor development, which is essential for a professional-grade result.
Step 3: Loading the Reactor
Add the mirepoix (onions, carrots, celery), garlic, peppercorns, and bay leaves. Add the apple cider vinegar. Fill with filtered water to the "Max Fill" line, ensuring all components are submerged. Use a digital scale to weigh ingredients if you are scaling the recipe for consistency.
Pro Tip: The acetic acid in the vinegar lowers the pH of the water slightly. This helps to break down the calcium and collagen in the bone matrix, facilitating a more thorough mineral extraction.
Step 4: High-Pressure Sequestration
Secure the lid and set the steam release to "Sealing." Select "Manual" or "Pressure Cook" on High for 120 minutes. Once the cycle completes, allow for a full natural pressure release (approximately 30 to 45 minutes).
Pro Tip: Forcing a quick release causes the liquid to boil violently as the pressure drops. This will aerate the fat into the liquid, resulting in a cloudy, greasy broth instead of a clear, refined elixir.
Step 5: The Clarification Phase
Strain the broth through a fine-mesh sieve into a large bowl. For a crystalline finish, line the sieve with cheesecloth. Discard the solids. Transfer the liquid to glass jars and refrigerate immediately.
Pro Tip: Rapid cooling is a safety imperative. Use an ice bath to bring the temperature down quickly before refrigeration. This preserves the molecular structure of the gelatin and prevents bacterial growth.
Section B: Prep & Timing Fault-Lines:
The most common timing error is failing to account for the "come to pressure" period. In a full 6-quart or 8-quart vessel, this can take 20 minutes. If you are on a tight schedule, pre-heating your filtered water in a kettle can shave 15 minutes off the total cycle. Another fault-line is the "Keep Warm" setting. If left on for hours after the cycle ends, the vegetables can over-extract, leading to a muddy, overly sweet flavor profile. Always monitor your equipment.
THE VISUAL SPECTRUM
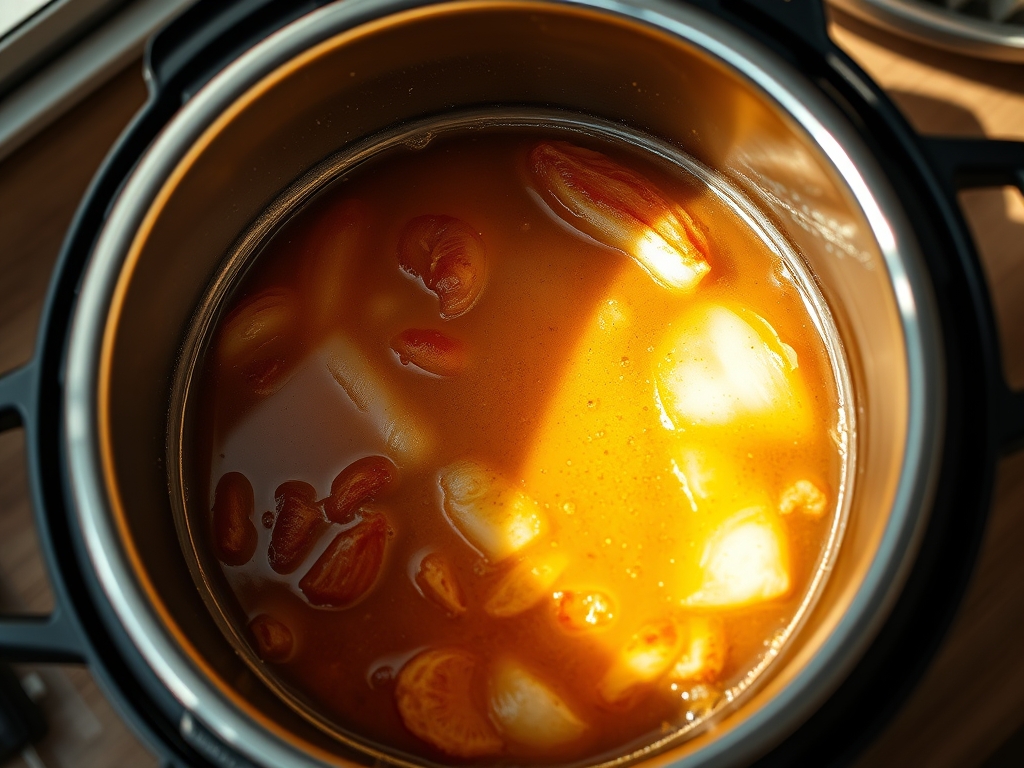
Section C: Thermal & Visual Troubleshooting:
Observe the Masterclass photo. Notice the deep amber hue and the clarity of the liquid. If your broth looks pale or grey, you skipped the roasting phase or failed to deglaze the pan effectively. If the broth is opaque and milky, you likely performed a quick pressure release or boiled the liquid too vigorously before sealing. To fix a dull color, you can simmer the strained broth with a few clean onion skins for ten minutes; the natural tannins will provide a golden glow. If the broth does not "gel" when cold, your bone-to-water ratio was too low. Next time, reduce the water or increase the knuckle count to ensure a higher concentration of gelatin.
THE DEEP DIVE
Macro Nutrition Profile:
A standard 250ml serving of beef bone broth contains approximately 40 to 50 calories, 9 grams of protein, and 0 grams of carbohydrates. It is a powerhouse of amino acids like glycine and proline.
Dietary Swaps:
- Vegan: Replace bones with dried shiitake mushrooms, kombu, and nutritional yeast for an umami-rich "No-Bone" broth.
- Keto/GF: This recipe is inherently keto-compliant and gluten-free. Ensure your apple cider vinegar is "with the mother" for maximum enzymatic benefit.
Meal Prep & Reheating Science:
When reheating, avoid the microwave if possible. Microwaves can heat unevenly and may degrade some of the more delicate proteins. Reheat on the stovetop over medium heat until the gelatin melts back into a viscous liquid. Do not let it reach a rolling boil for an extended time, as this can alter the mouthfeel.
THE KITCHEN TABLE
Why is my bone broth bitter?
Bitterness usually stems from over-cooking the vegetables or including charred, burnt bits from the roasting process. Ensure you only roast the bones to a deep brown, not black. Also, avoid adding herbs like parsley until the final 10 minutes.
Can I reuse the bones for a second batch?
Yes. This is known as a remouillage. While the second extraction will be less concentrated, it is excellent for use as a base for grains or poaching liquids. It maximizes the value of your initial mineral investment.
How long does it stay fresh?
Store in the refrigerator for up to 5 days. For long-term storage, freeze in silicone molds. Once frozen, transfer the pucks to a vacuum-sealed bag. They will maintain their structural and flavor integrity for up to 6 months.
Is the fat cap on top safe?
The "tallow" or "schmaltz" layer that forms on top acts as a natural airtight seal. Keep it intact until you are ready to use the broth. It protects the liquid underneath from oxidation and can be used for high-heat sautéing.