The kitchen is a laboratory of thermal dynamics where the margin between succulent perfection and rubbery failure is measured in mere seconds of atmospheric pressure. We are moving beyond the archaic methods of the stovetop pot; we are entering the realm of the high-velocity steam chamber. When you execute an Instant Pot Chicken Breast protocol, you are not just cooking dinner. You are managing a pressurized environment to force moisture into the protein fibers before they have the chance to contract and expel their precious juices. Imagine the hiss of the valve and the concentrated aroma of aromatics being driven deep into the muscle tissue. This is efficiency redefined. We are looking for that specific point of structural integrity where the meat remains tender enough to yield to a fork but firm enough to hold a clean slice. Forget the dry, stringy disasters of your past. We are here to audit your infrastructure and upgrade your poultry output to professional standards using precision engineering and steam-driven thermal transfer.
THE DATA MATRIX
| Metric | Specification |
|---|---|
| Prep Time | 5 Minutes |
| Execution Time | 10 Minutes (Active) / 10 Minutes (NPR) |
| Yield | 4 Standard Servings |
| Complexity | 2 / 10 |
| Estimated Cost per Serving | $2.25 USD |
THE GATHERS
Ingredient Protocol:
- 900g / 2 lbs Boneless Skinless Chicken Breasts (Uniform size)
- 250ml / 1 cup Low-Sodium Chicken Bone Broth
- 15ml / 1 tablespoon Extra Virgin Olive Oil
- 5g / 1 teaspoon Smoked Paprika
- 3g / 0.5 teaspoon Garlic Powder
- 3g / 0.5 teaspoon Onion Powder
- 6g / 1 teaspoon Kosher Salt
- 2g / 0.5 teaspoon Freshly Cracked Black Pepper
- 1 sprig Fresh Rosemary (to infuse the steam)
Section A: Ingredient Quality Audit:
The primary failure point in poultry procurement is "woody breast syndrome." This is a metabolic condition in broiler chickens that results in hard, pale, and inelastic muscle fibers. If your raw material feels unnaturally firm or displays white striping, no amount of pressure will fix the texture. To troubleshoot, always source air-chilled poultry. Standard water-chilled birds are often injected with a saline solution that dilutes the natural flavor and leads to a viscous, unappealing purge during the cooking process. If you find your meat is too lean, a quick 15-minute dry brine with kosher salt will help denature the proteins, allowing them to trap more moisture during the high-pressure phase.
THE MASTERCLASS

1. Surface Preparation and Seasoning
Place your poultry on a clean workstation. Use a digital scale to ensure each breast is approximately 225g to maintain timing uniformity. Pat the surfaces completely dry with lint-free towels to ensure the oil and spices adhere rather than sliding off in a slurry. In a small stainless steel bowl, combine your dry spices. Coat each piece thoroughly, pressing the rub into the flesh to ensure it does not wash away during the steam cycle.
Pro Tip: This stage is about surface tension. By drying the meat, you allow the fats to create a molecular bond with the spices. Professional chefs use a bench scraper to quickly clear the station of any trim or excess salt, maintaining a sterile and efficient workflow.
2. Establishing the Liquid Base
Pour your 250ml of bone broth into the inner liner of the pressure vessel. It is imperative to use a liquid that offers more than just moisture. A high-quality broth will infuse the meat with collagen and minerals. Add the rosemary sprig directly into the liquid. Place the stainless steel trivet into the pot, ensuring the handles are upright for easy extraction.
Pro Tip: Never let the meat sit directly in the liquid unless you are poaching for a shredded application. Elevating the protein on a trivet allows for 360-degree steam circulation, which prevents the bottom of the breast from becoming waterlogged and mushy.
3. The Pressure Phase
Arrange the seasoned breasts on the trivet in a single layer. Overlapping will create "cold spots" where the steam cannot penetrate, leading to uneven doneness. Secure the lid and verify the sealing ring is seated correctly. Set the device to Manual/High Pressure for 6 to 8 minutes depending on the thickness of the cuts.
Pro Tip: Timing is a function of mass and density. Use a digital scale to verify your total weight. For every additional 200g of meat, you do not necessarily need more time; you need more space for steam to aerate the gaps between the pieces.
4. Controlled Atmospheric Release
Once the timer expires, do not touch the vent. Allow for a 10-minute Natural Pressure Release (NPR). This is the most critical stage of the Masterclass. A sudden drop in pressure (Quick Release) causes the moisture inside the chicken to boil violently, tearing the cellular structure and resulting in a dry, "bleached" texture. After 10 minutes, flick the valve to release any remaining steam.
Pro Tip: Use an instant-read thermometer to verify an internal temperature of 165 degrees Fahrenheit (74 Celsius). If you are slightly under, the carryover heat during the resting phase will finish the job. Professional kitchens rely on these thermal probes to guarantee safety without sacrificing quality.
5. The Rest and Slice
Transfer the chicken to a warm cutting board. Cover loosely with foil and let the proteins relax for at least 5 minutes. This allows the internal juices to redistribute. If you cut too soon, the liquid will escape, leaving the fibers parched. Use a sharp slicing knife to cut against the grain for maximum tenderness.
Pro Tip: While the meat rests, you can deglaze the remaining liquid in the pot. Switch to the "Sauté" function and whisk in a cold pat of butter to create a viscous, piquant pan sauce that captures all the rendered fats and spices.
Section B: Prep & Timing Fault-Lines:
The most common human error is the "Burn" notice. This usually occurs because the liquid level is too low or there are scorched bits of protein on the bottom of the liner. Always ensure you have a minimum of 250ml of thin liquid. Another fault-line is the "Rubber Effect," caused by overcooking. If your breasts are small (under 150g), reduce the high-pressure time to 5 minutes. Precision is the antidote to mediocrity.
THE VISUAL SPECTRUM
Section C: Thermal & Visual Troubleshooting:
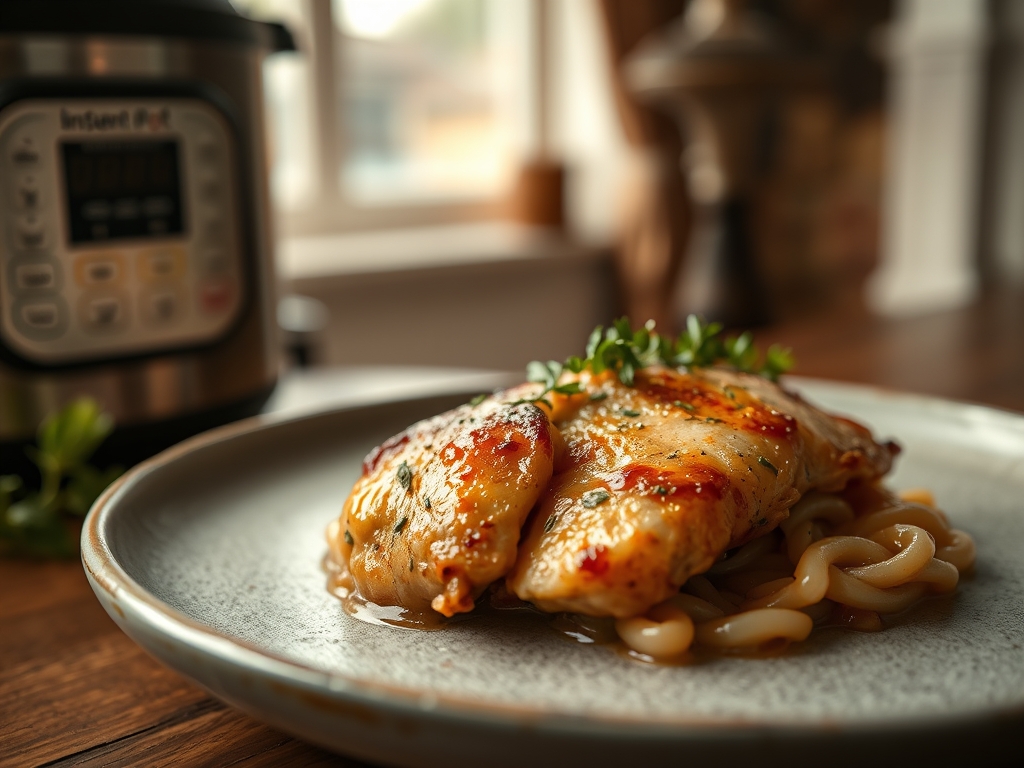
Referencing the Masterclass photo, observe the matte finish of the spice rub and the plump, convex shape of the breast. If your chicken looks flat or grey, you likely skipped the seasoning rub or used a Quick Release method. Uneven browning is expected in a steamer; this is not a searing technique. However, if the color is dull, you can render a small amount of butter in a saucier and spoon it over the sliced meat to add a professional sheen. If the interior looks "stringy," the grain was likely cut longitudinally rather than transversally.
THE DEEP DIVE
Macro Nutrition Profile:
A standard 150g serving provides approximately 45g of protein, 6g of fat, and 0g of carbohydrates. This makes it an elite tier fuel source for muscle synthesis and metabolic efficiency.
Dietary Swaps:
- Vegan: Substitute the poultry with extra-firm pressed tofu blocks; reduce pressure time to 3 minutes.
- Keto: Replace bone broth with a mix of heavy cream and water to increase healthy fats.
- GF: This protocol is naturally gluten-free; ensure your bone broth brand does not use yeast extract derived from barley.
Meal Prep & Reheating Science:
To maintain molecular structure during reheating, avoid the microwave's high-frequency radiation which toughens fibers. Instead, slice the chicken cold and gently warm it in a pan with two tablespoons of broth. This re-introduces moisture and prevents the protein from reaching the "leather" phase of over-coagulation.
THE KITCHEN TABLE
How do I prevent the chicken from smelling "gamey"?
Always use a piquant acidic element like a splash of lemon juice or apple cider vinegar in the poaching liquid. This neutralizes trimethylamine and brightens the overall flavor profile of the protein.
Can I cook chicken from frozen?
Yes. Increase the high-pressure timer to 12 minutes. Ensure the breasts are not frozen together in a solid block, as the steam cannot penetrate the center of a frozen mass effectively.
Why is my chicken pink near the center?
Check the temperature with a probe. If it reads 165F, the pinkness is likely a reaction between the meat's myoglobin and the nitrogen dioxide in the pressure cooker environment; it is safe to consume.
What is the best way to shred this?
While the chicken is still hot from the NPR phase, use a stand mixer with the paddle attachment on low speed. It will perfectly shred the entire batch in under 30 seconds.