Imagine the kitchen as a high-velocity testing lab where the stakes are measured in viscosity and flavor saturation. You are not just cooking; you are managing a complex series of chemical transitions. The air thickens with the scent of rendered aromatics while the soft hum of a motor prepares to transform a chaotic pot of vegetables into a seamless, silken masterpiece. This is the art of the Immersion Blender Soup. We are moving beyond the rustic, chunky stews of the past and entering the realm of molecular uniformity. To achieve that perfect, glossy mouthfeel, you must respect the physics of mechanical shear. It is about more than just heat; it is about the structural integrity of every cell wall in your mirepoix. Whether you are aiming for a piquant roasted red pepper bisque or a deep, earthy mushroom velvet, the goal remains the same: total emulsification. Prepare your station. Calibrate your senses. We are about to audit the very foundation of liquid comfort through the lens of professional culinary engineering.
THE DATA MATRIX
| Metric | Specification |
|---|---|
| Prep Time | 20 Minutes |
| Execution Time | 45 Minutes |
| Yield | 1.9 Liters (approx. 2 Quarts) |
| Complexity (1-10) | 4 (Technique Sensitive) |
| Estimated Cost per Serving | $1.45 USD |
THE GATHERS
Ingredient Protocol:
- Aromatic Base: 225g / 2 cups Yellow Onion, finely diced.
- Structural Vegetable: 900g / 2 lbs Butternut Squash or Carrots, peeled and cubed.
- Liquid Phase: 1.2L / 5 cups High-Quality Chicken or Vegetable Stock.
- Fat Source: 56g / 4 tbsp Unsalted Butter or Extra Virgin Olive Oil.
- Acidity: 15ml / 1 tbsp Apple Cider Vinegar or Lemon Juice.
- Seasoning: 10g / 2 tsp Kosher Salt (adjust to taste).
- Aromatics: 3 cloves Garlic, smashed; 5g / 1 tsp Fresh Thyme leaves.
Section A: Ingredient Quality Audit:
The most common failure point in an Immersion Blender Soup is the use of out-of-season or dehydrated root vegetables. If your squash feels light for its size or your carrots are rubbery, the starch-to-sugar ratio is compromised. This leads to a grainy texture that no amount of blending can fix. To rectify this, perform a pre-roasting sequence at 200C (400F) to concentrate sugars through caramelization before they ever hit the pot. If your stock lacks body, infuse it with a piece of Parmesan rind or a dried kombu sheet for ten minutes prior to the main cook. This adds a layer of glutamates that provides a "savory floor" for your flavor profile.
THE MASTERCLASS
1. Thermal Foundation and Rendering
Begin by heating your saucier over medium-low heat. Add your fat source and wait for the shimmering phase. Add onions and salt. The salt acts as a desiccant, drawing out moisture to prevent premature browning while the onions render until translucent.
Pro Tip: Use a digital scale to weigh your aromatics. Consistency in mass ensures that the ratio of water-to-solids remains constant, which is critical for the final viscosity. Professional kitchens rely on weight, not volume, to ensure every batch is identical.
2. The Deglaze and Simmer Protocol
Add your primary vegetables and garlic. Increase the heat slightly to initiate the Maillard reaction on the edges of the vegetables. Once a light golden crust forms, deglaze the pan with a splash of stock, using a wooden spoon to scrape up the fond. Pour in the remaining liquid and bring to a gentle simmer.
Pro Tip: Never allow the soup to reach a rolling boil. High turbulence can break down delicate flavor compounds and cause the fats to separate prematurely. A steady, gentle simmer preserves the piquant notes of your herbs.
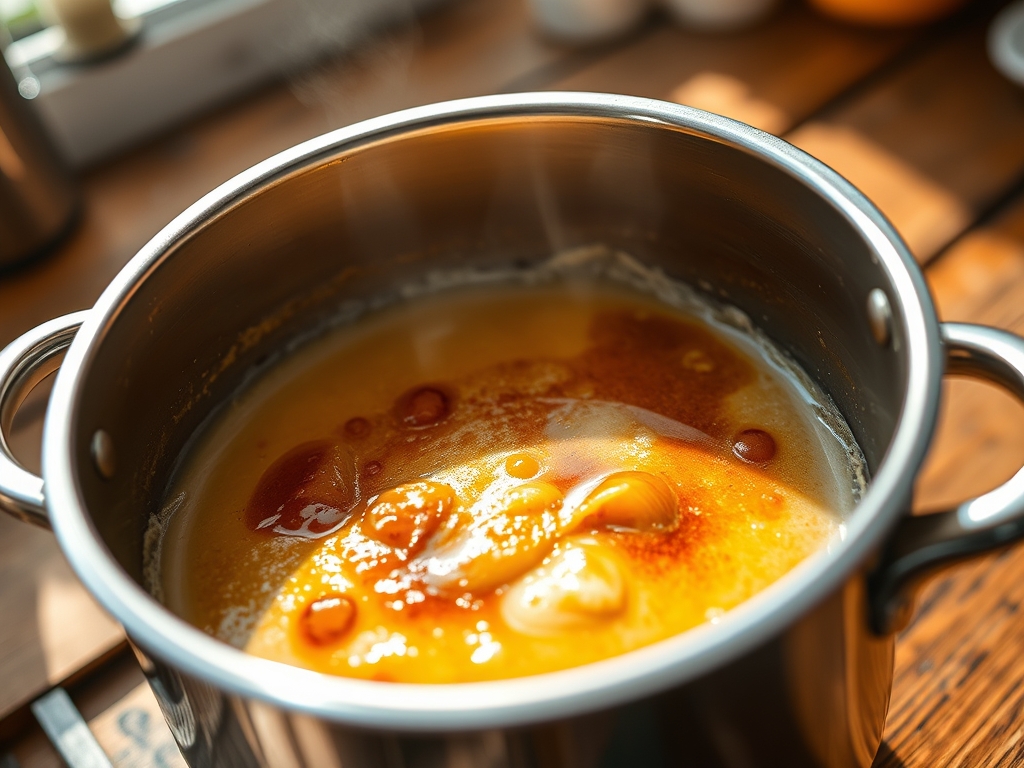
3. Mechanical Shear and Emulsification
Once the vegetables are fork-tender, remove the pot from the heat. Submerge the head of your immersion blender completely to avoid introducing excess air. Start on the lowest setting and gradually increase speed, moving the wand in a slow, circular motion to create a vortex.
Pro Tip: To achieve a "restaurant-grade" finish, pass the blended liquid through a chinois (fine-mesh strainer). This removes any remaining fibrous micro-structures that the blades missed, ensuring a perfectly viscous and uniform texture.
4. Final Seasoning and Brightness
Taste the soup at its service temperature. Add your acidity (vinegar or lemon juice) and final salt adjustments. The acid acts as a "brightness dial," cutting through the density of the starch and fat.
Pro Tip: Use a bench scraper to cleanly transfer any minced herbs or garnishes from your cutting board to the bowl. Precision in the final moments prevents the "muddying" of flavors and keeps your workspace organized.
Section B: Prep & Timing Fault-Lines:
Timing is the silent killer of great soup. If you blend too early, the vegetable fibers will be "stringy" rather than "creamy." If you overcook, the colors will shift from vibrant oranges and greens to a dull, institutional gray. Always use a timer. For most root-based soups, 25 to 30 minutes of simmering is the "Goldilocks Zone." If the temperature exceeds 95C (203F) for too long, you risk scorching the bottom of the pot, which will impart a bitter, burnt note to the entire batch.
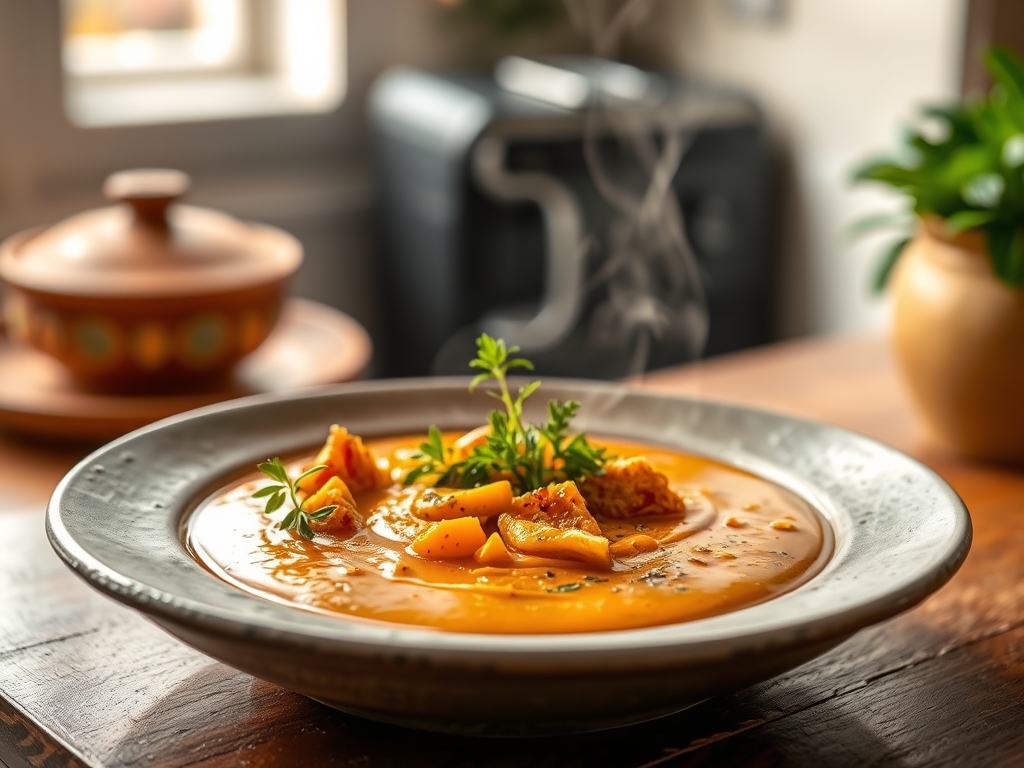
THE VISUAL SPECTRUM
Section C: Thermal & Visual Troubleshooting:
Look at the Masterclass photo above. Notice the deep, consistent hue and the lack of visible oil droplets on the surface. If your soup looks broken or "split," it means the fat has separated from the water phase. To fix this, add a splash of heavy cream or a knob of cold butter and re-blend at high speed to aerate and re-emulsify the mixture. If the color is dull, you likely over-oxidized the vegetables. Next time, add a handful of fresh spinach or parsley during the last 60 seconds of simmering to "color-correct" the green profile without altering the flavor significantly.
THE DEEP DIVE
Macro Nutrition Profile:
A standard serving of this vegetable-based immersion soup typically contains 180-250 calories. It is high in Vitamin A and dietary fiber, provided you do not over-filter the solids. The fat content is adjustable based on your choice of butter or oil.
Dietary Swaps:
- Vegan: Replace butter with coconut oil or cashew cream for a rich, dairy-free mouthfeel.
- Keto: Swap high-starch squash for cauliflower or broccoli; increase the fat ratio with heavy cream.
- GF: Naturally gluten-free, provided your stock is certified.
Meal Prep & Reheating Science:
When cooling the soup for storage, use an ice bath to drop the temperature rapidly. This prevents the growth of thermophilic bacteria and preserves the molecular structure. When reheating, do so over low heat. High microwave settings can cause "explosive" steam pockets that break the emulsion, leaving you with a watery mess. A gentle whisking during reheating will re-incorporate any settled solids.
THE KITCHEN TABLE
Why is my soup grainy even after blending?
This usually indicates undercooked vegetables or "woody" older produce. Next time, simmer for an extra five minutes and ensure you are using the highest speed setting on your immersion blender to fully pulverize the cell walls.
Can I blend the soup while it is boiling?
Absolutely not. Blending boiling liquid is a safety hazard; the steam can create pressure that sprays hot liquid. Remove the pot from the heat and let it settle for two minutes before introducing the blender.
How do I make the soup thicker without flour?
The best way is to reduce the initial liquid volume or add a single starchy potato to the simmer. The natural starches will provide a thick, viscous texture once blended without masking the primary vegetable flavors.
My soup tastes flat despite adding salt. What is wrong?
You are likely missing acidity. A teaspoon of lemon juice or sherry vinegar acts as a chemical "highlighter," bringing the existing flavors into sharp focus without making the soup taste sour.
What is the best way to store leftovers?
Store in airtight glass containers for up to four days. If freezing, leave 2cm of headspace for expansion. Note that potato-heavy soups may change texture slightly upon thawing due to starch retrogradation.